Page collection settings
A number of settings can be edited for the page collection, this way:
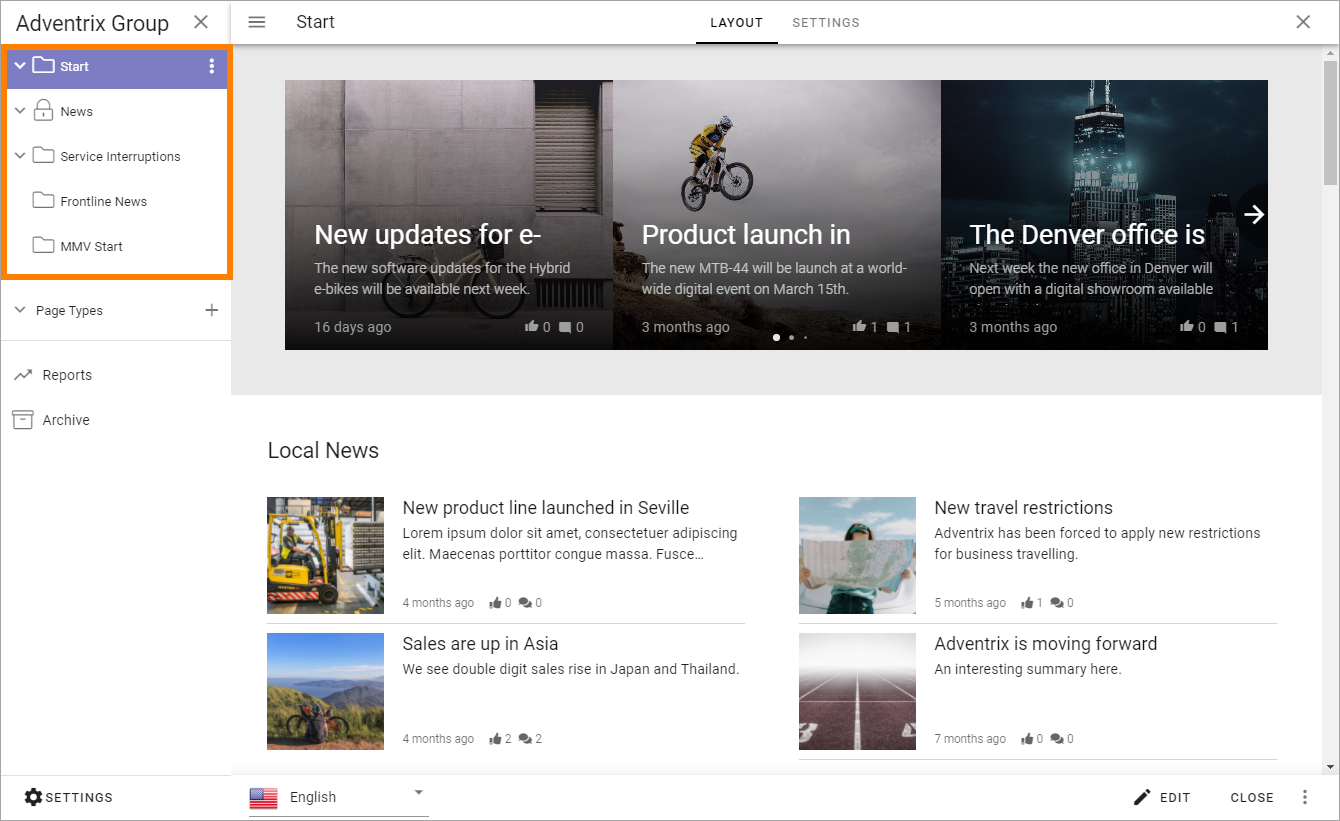
Edit a page in the publishing app and open the page menu.
Click the main navigation node for the page collection.
In this example, three page collections has been added in the publishing app, besides Start and News, and “Start” is selected:
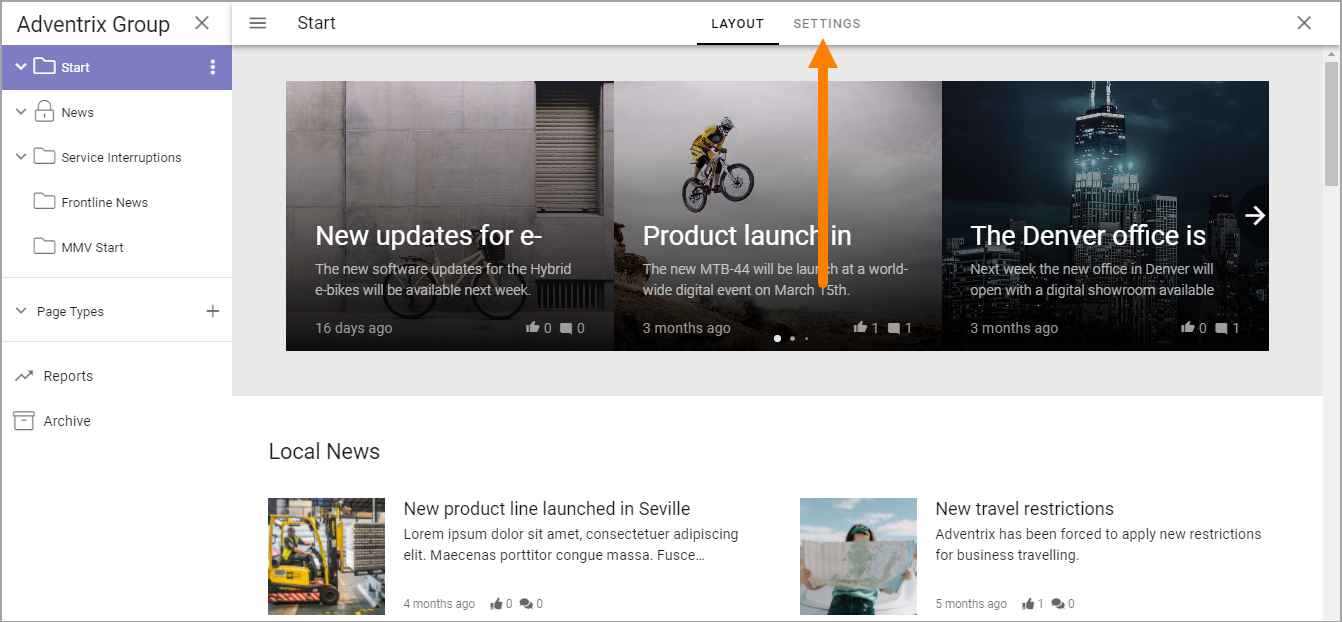
Click “Settings”.
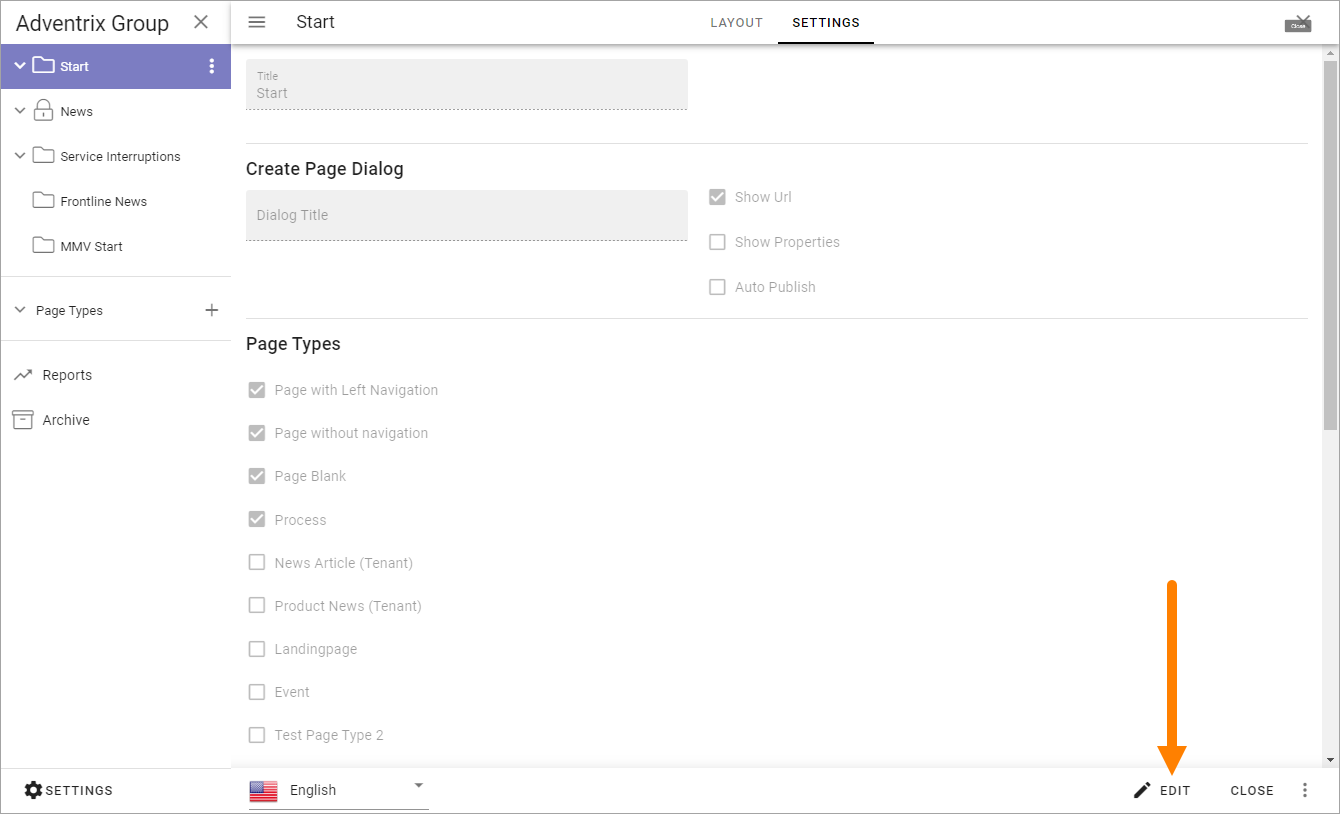
Click “Edit” at the bottom to edit the settings.
Use the following settings:
Navigation structure/Flat: Here you can see what was selected when the page collection was created. If you want to change from navigation structure to flat in an existing page collection, you need to first manually flatten the page structure (move sub pages so they all become main pages, or remove them) and then use the option here. You can always change from flat to navigation structure.
Title: The title for the page collection is shown here. It can be edited if needed. It’s updated everywhere it’s shown when the changes here are published.
Layout: Here a layout can be selected. Layouts are created in Omnia admin.
Create page dialog: You can set the title for the dialog displayed when an editor has selected to create a new page. If you leave this field blank, the dialog title will be “Create new page”.
Show URL: If the URL for the new page should be shown for the editor when creating a page, select this option. The URL can then be edited.
Show properties: If available page properties should be shown for the editor when creating a page, select this option. The properties can then be edited in that stage. Page properties can always be edited after the page has been created.
Auto publish: This is a setting probably most relevant for communities, but can of course be used for any types of pages. If this option is selected a new page is always published automatically. It’s only applicable when a new page is created, not when it’s updated.
Page types: Select which of the page types that should be available for an editor to select when creating a page in this page collection. It can be local page types or tenant page types. Tenant page types are indicated by the text “(Tenant)”. For more information, see this page: Tenant page types.
Publishing policies: Prompts set up under “AI features” in Omnia admin can be available for page authors to use, to let AI review a page before publishing.
Automatic page creation: A copy of a page can be published automatically to another page collection or another tenant, when certain rules are met. For more information, see this page: Automatic page creation
Promotion channels: You can configure promotion channels to send teasers to Microsoft Teams, Viva Engage, and via Email - for example to use in a publishing campaign. For details, see below.
Viva Engage integration: A Viva integration can be set up here. See below for details.
Taxonomy connection: When this option is activated, it’s possible to connect the page collection to a taxonomy. Whenever a page is created in the page collection, a term will be created in the connected taxonomy and the page will automatically be tagged with the newly created term. This can, for example, be useful in different rollups. For more information, see below.
Publishing approval: (Called juast Approval in earlier versions of Omnia 7.10). If approval should be needed for publication of pages (new pages and updates), enable this. If not enabled, editors can publish directly. See more info about approval settings below.
Deletion approval: Works the same and has almost the same settings as publishing approval, but for page deletion. An important difference is that multistep approval is not availble for deletion approval for a page. For more information, see below.
Activities: For a community, activity tracking can be activated. See the heading Settings for activity points on this page, for more information: Setting up a community
Notifications: (Available in Omnia versions before 7.11). This setting defines when a notification that a page is new should be shown for users, for example in the notification panel.Per default it’s only when the page is created, not when it’s updated. If this option is activated the page is considered to be new every time it’s updated and a new version is published.
Publish notifications: Renamed option in 7.11 and later, and replaces “Notifications”. Contains two settings. See below for more information.
Send as Email: Select “Enable send page as Email” if pages in the page collection should be available to send through Email. One example of when this is needed is in a Newsletter implementation. If this option is activated, authors can decide to send the new or edited page by email, or decide not to, each time the page is published. Note! If “Send as Email” is activated, “Scheduling” can’t be used.
Scheduling: If scheduling should be available in this page collection, select this option and select the property to be used. The author can then set a scheduled start date and time, using the PROPERTIES tab for the page. Note that scheduled publishing never is mandatory, an author can always choose to publish without using scheduling.**Note!** If “Schedling” is activated, “Send as “Email” can’t be used.
Break permission inheritance by default: Select this option if inheritance should be broken when a new page is created within the page collection. This could, for example, be useful for communities. When this option is active, the colleague creating the page will be the page owner, meaning that he or she has full control over who can edit. The new option “Invite co-authors” can then be used to easily add authors for the page, see below.
Allow invitation of co-authors: If this option is selected, authors can invite co-authors. See below for more information.
Channel: If you activate “Enable publishing to channels”, it will be possible for an author to select channels the page should be published to. Publication to a channel may require approval from the channel administrator. See more information below.
AI generated content: (This option was called “Open AI” in Omnia 7.7 and earlier). When you activate this option, if available, you can set properties for what the AI should be able to work with, see below. Also note that tenant features must be activated for this option to be available and settings for AI have to be made in Omnia Admin.
Semantic search: Can be available if a tenant feature is activated. It’s applicable for all pages in the page collection, but note that if there are existing pages when you activate this option, these pages have to be re-published to be indexed for semantic search.
Enable page checker: Available in Omnia 7.10 and later. This is a validation for accessibility you can select. When you preview the page (Preview mode), you can receive a warning if there are any accessibility issues. See this page for more information: Accessibility check when editing pages
Note! A prerequisite for semantic search is SharePoint sync. It’s needed to be able to index page collections. Also see Important notes about semantic search below.
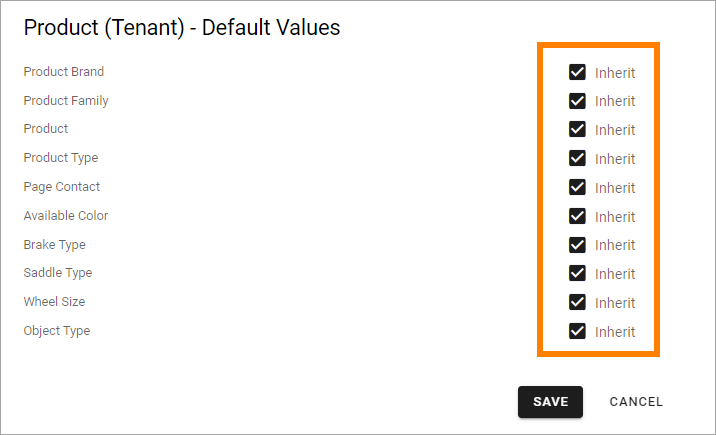
Set default values for a page type
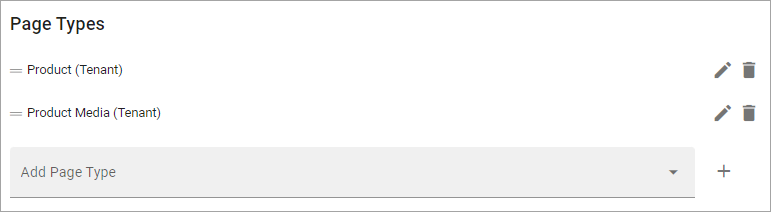
You can set default values for the page types that has been added to the page collection. Any changes you do applies to the active page collection only.
Click the pen for the page type.
The default setting is that the settings are inherited from the tenant setting.
Deselect a settings to change it.
Set a new default value for the page type, using the field that becomes available.
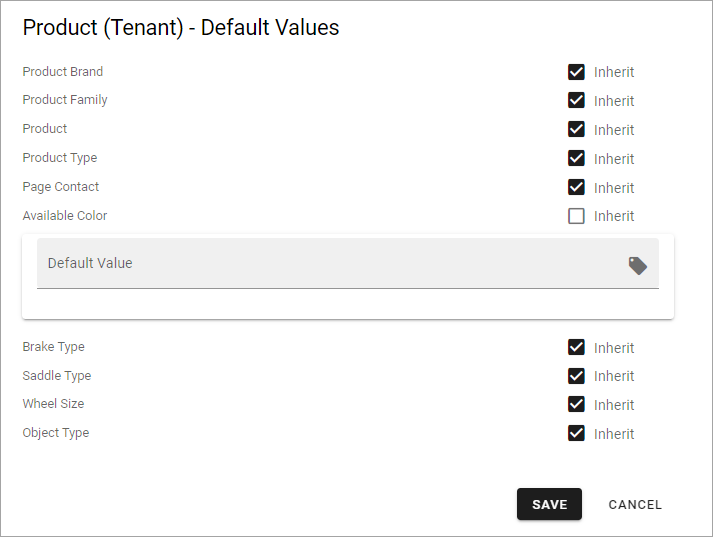
Don’t forget to save your changes.
Setup a promotion channel
Important note! When using scheduled publishing for a page, a post from a promotion channel can not be published to Microsoft Teams or to Viva Engage.
Do the following to set up a promotion channel:
Click the plus.
Use the following settings:
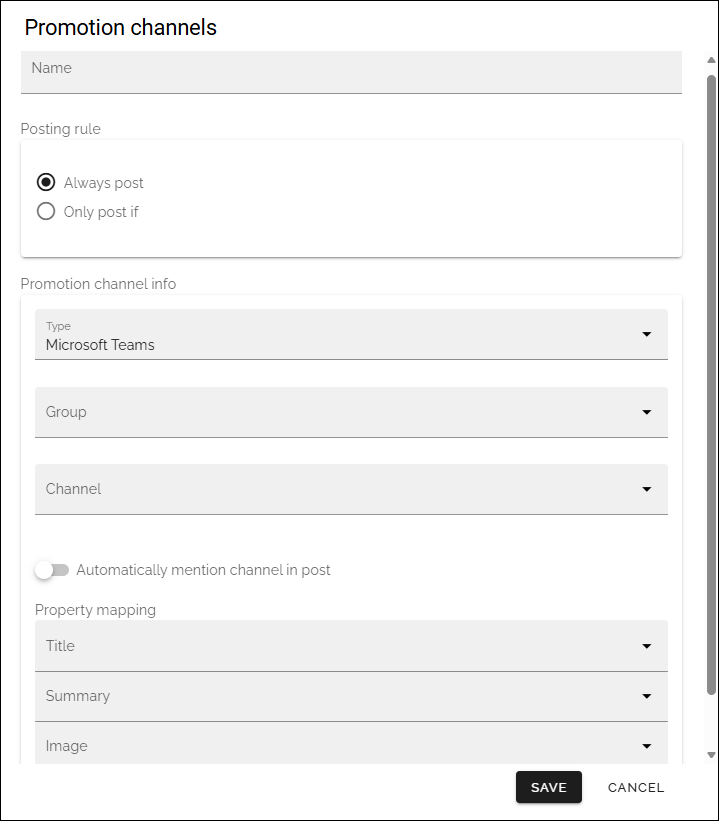
Name: Add a name for the promotion channel here.
Posting rule: You can choose that a teaser for a new page in this page collection should always be published in this promotion channel, or you can set up rules for publishing. More information about this below.
Type: Can be Microsoft Teams, Viva Engage or Email.
Group: Select which group the promotion channel is tied to. If you selected Microsoft Teams, it’s a list of Teams groups and so on.
Channel: For a Microsoft Teams group, several Teams channels can exist. Select channel here. (Not available for Viva Engage or Email).
Automatically mention channel in post: If the channel name should be shown in postings, select this option.
Property mapping: The properties used for the teaser are listed here (properties in the image above is an example). Map properties you use for these purposes.
To set a posting rule, first select “Only post if”.
Then select property, make other choices if necessary, and click ADD.
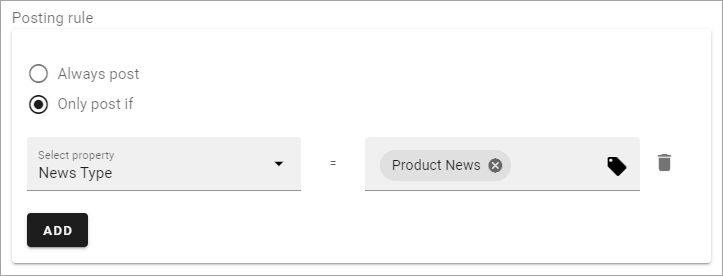
In this simple example, a teaser should only be published to this promotion channel if the news type is Product News.
You can add several posting rules if needed, to further limit what will be published.
(Don’t forget to save when you’re done).
Viva Engage integration
Only one integration with a Viva Engage group can be set up for a page collection. To set up a the integration, use these settings:
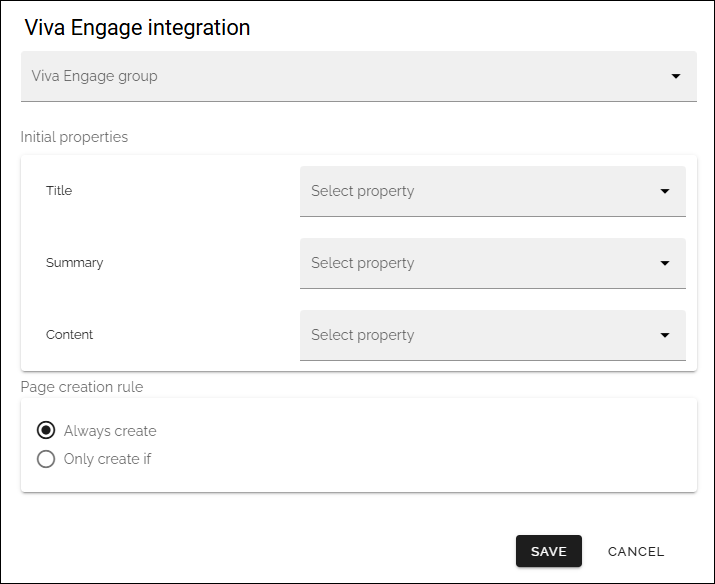
Choose the Viva Engage group and set the properties for Title, Summary and Content, where the content will be collected and sent to the Viva Engage group.
A page creation rule is set up the same way as for channels, see above.
Enable taxonomy connection
When you enable taxonomy connection, select a taxonomy from the list.
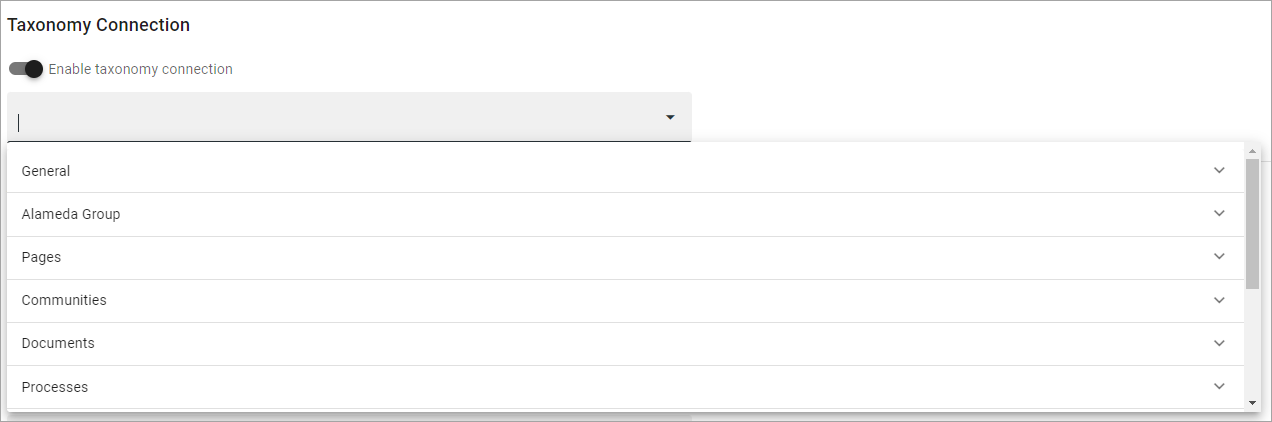
When you have done that every new page in the page collection creates a term in the selected taxonomy, based on the title of the page. The newly created page is automatically tagged with the new term.
Note! If you change a title of a page, the term for the page is NOT changed automatically. If you would like to change the term as well, you have to do that in the term set manually.
Also Note! You must see to that the editors/authors that will create pages in this page collection has permissions to create terms in the selected term set.
Settings for approval
When approval is activated, the following settings are available:
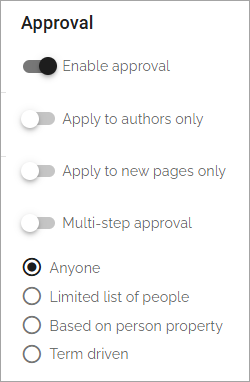
Apply to authors only: If you select this, editors never need approval, they can always publish directly. When an author publishes, approval is needed.
Apply to new pages only: When this option is selected, only creating new pages needs approval, not when updating an existing page.
Multi step approval: Normally, when this option is not used, only one colleague can approve a page. When this option is used, a number of steps for approval can be set up, meaning several colleagues can need to approve a page. For more information, see below.
When approval is activated, you can select who can approve the creation of a page this way (also used in the multi step approval settings, see below):
Anyone: The author can select any colleague as approver when a page is published. See below for more information.
Limited list of people: You define the approvers using the field shown (see below). You can define one or more approvers but only one approval is needed each time, from any of the approvers.
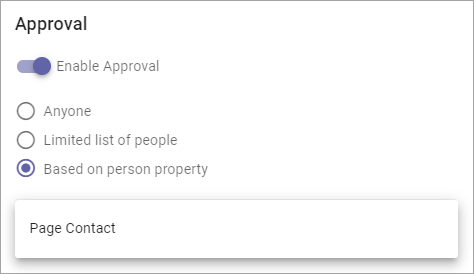
Based on person property: You select property from the list shown (see below).
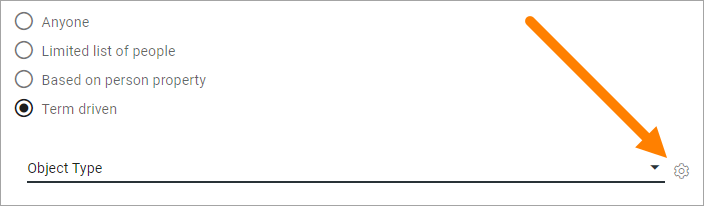
Term driven: Authors can select approvers from a defined list only. Available approvers depend on the properties selected for the pages. You select the term(s) here. When you have selected one or more terms you can use the cogwheel to set approvers for individual terms in the set.
When “Anyone” is selected the following is shown when an editor sends the page for approval:
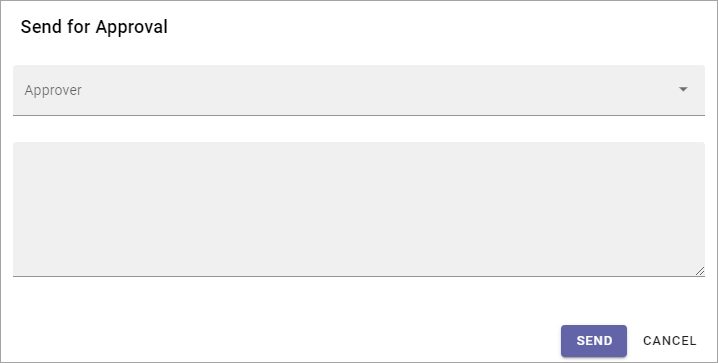
The author adds the approver to the field “Approver”, types a message and sends the approval request.
When selecting “Limited list of people”, you add approvers by typing their names in the field displayed:
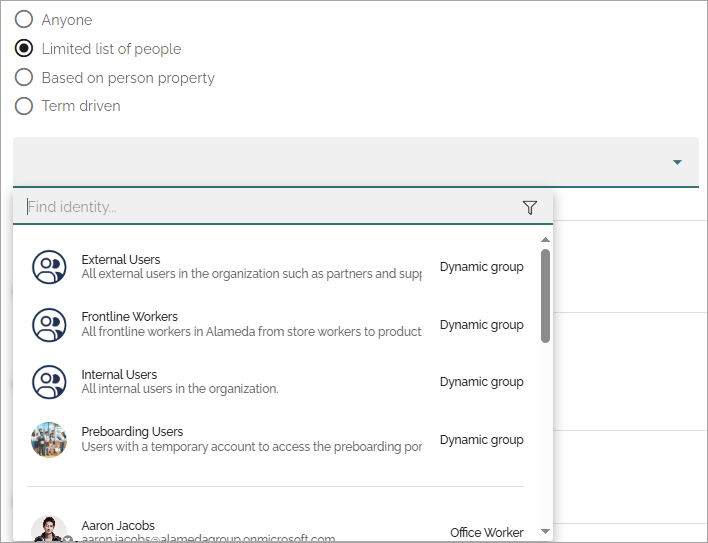
Authors can then only choose between the colleagues in the list when selecting approver.
When you select “Based on person property”, you open the list and select property. Normally just one or two properties are available. Page contact is an example of a field that can be relevant, if such a property is set up.
Based on person property can result in more colleagues being available for approval. Authors can only choose between these colleagues when selecting approver.
For more information, see this page: Properties
For Term driven, you first select a term, then click the cogwheel.
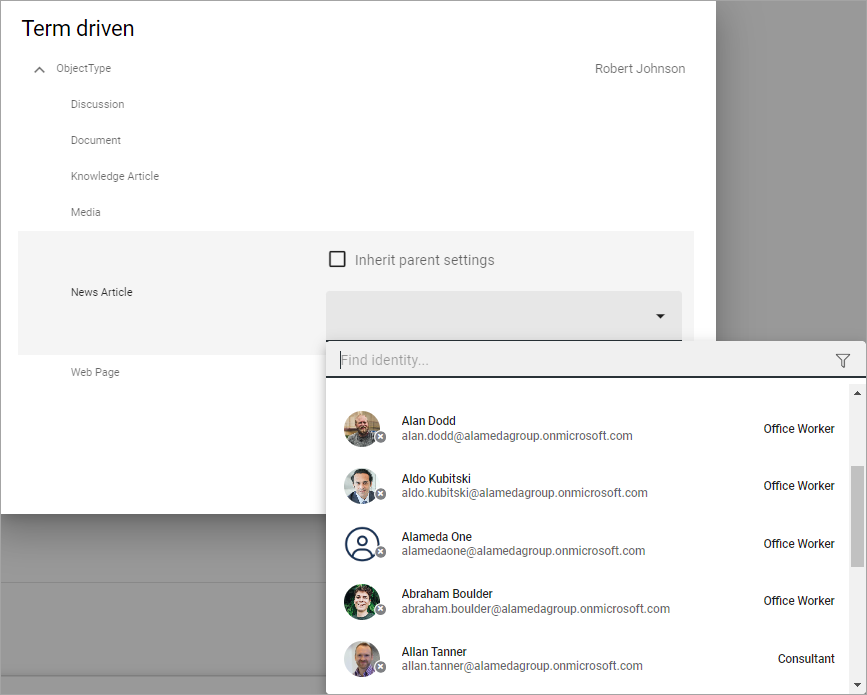
Then select the colleague or group that should be available for approval for the term.
In this exeample Robert Johnson is set as approver for all object types (the parent). If you would like to select someone else to be avaialable as approval for, let’s say News article, deselect “Inherit parent settings” and select colleague or group there.
Setting up multi step approval
When Multi step approval is selected, you set it up this way:
Click ADD STEP and set the following:
Add a description of the step in any tenant language.
Select who should be able for approval in this step. See above for information about the options.
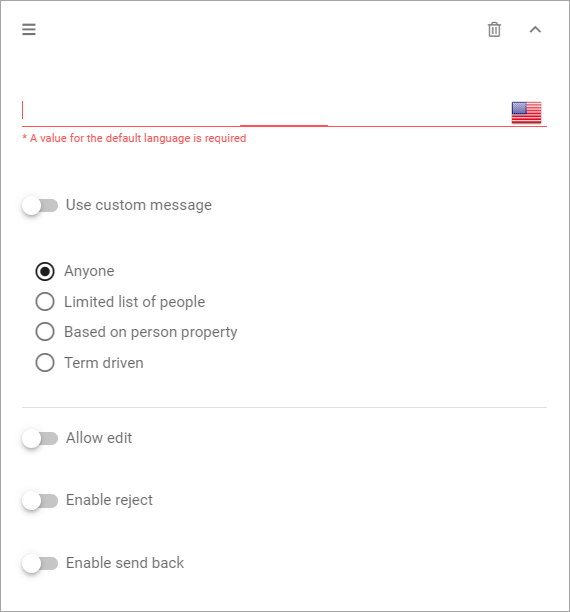
Set the following:
Use custom message: Use this to customize texts, see below.
Allow edit: If this option is selected the “approver” can edit the page with the changes he or she sees as necessary and then approve for publishing, or send back with a comment (if send back is activated for that step).
Enable reject: Select this option if publication could be rejected in this step.
Enable send back: If it should be possible to send back to previous approval step from here, select this option.
When you select “Use custom message” you can set the following:
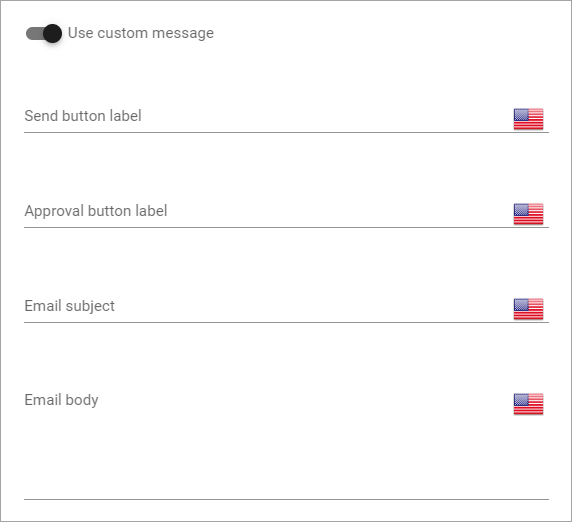
What you can use the fields for should be self explanatory. Also note that you can add button labels, and text for the Email, for different languages by clicking the flag.
Continue adding the needed approval steps the same way.
When you’re finished it can look something like this:
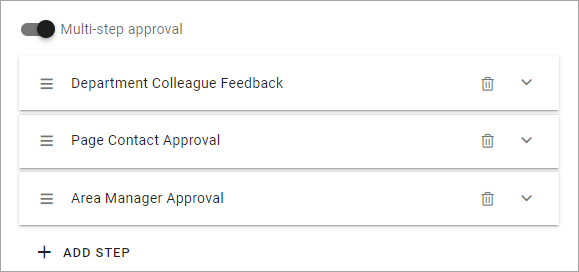
To edit a step, just expand it and use the settings as described above. To adjust the order of the steps, use drag and drop. To delete a step, click the dust bin.
Don’t forget to to publish to save your settings.
Settings for page deletion approval
When deletion approval is activated, the following settings are available:
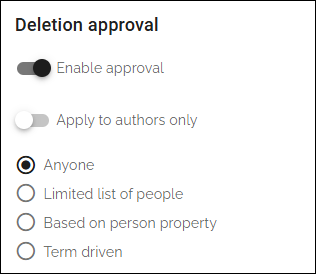
Apply to authors only: If you select this, editors never need approval, they can always delete a page directly. When an author deletes, approval is needed.
Anyone: The author can select any colleague as approver when a page is deleted. See above for more information.
Limited list of people: You define the approvers using the field shown (see above). You can define one or more approvers but only one approval is needed each time, from any of the approvers.
Based on person property: You select property from the list shown (see above).
Term driven: Authors can select approvers from a defined list only. Available approvers depend on the properties selected for the pages. You select the term(s) here. When you have selected one or more terms you can use the cogwheel to set approvers for individual terms in the set.
Note that Multi-step approval is not available for deletion approval. Other than that, settings work the same as for publishing approval, see above.
Publish notifications
Two options are available here:
Update notification panel on re-publish: Default setting: a notification is shown in the notification panel when a new page is created, but not when it’s updated. If you activate this option, a notification is shown when publishing changes as well. This is the same option that was just called “Notifications” in earlier Omnia versions.
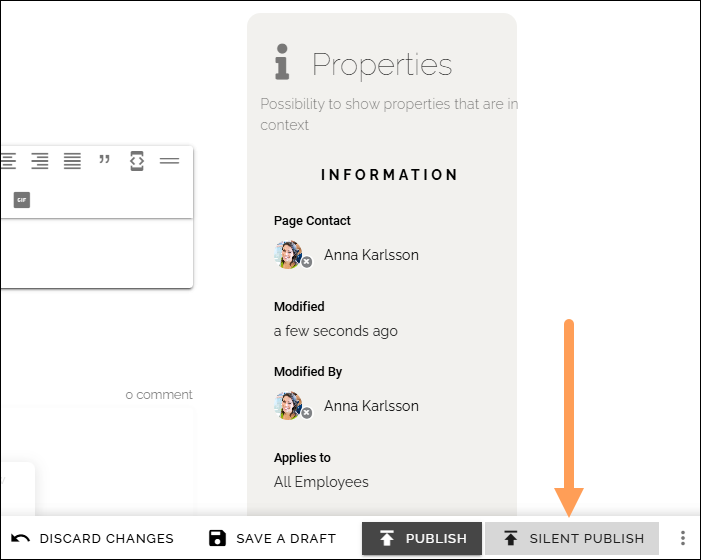
Enable silent publish: Available in Omnia 7.10 and later. Select this option if it should be possible to publish small changes to a page without any notifications created, not even for variations. If publishing approval is activated, publishing still has to be approved.
Note! Silent publishing is available when the page is updated, not when it’s published the first time. Also note that the combination of disabling the setting “Update notification panel on re-publish” and enabling the setting “Enable silent publish” only makes sense if variations are used within the publishing app.
When “Enable silent publish” is available, an additional publishing button is available for authors, for example:
Allow invitation of co-authors
If “Allow invitation of co-authors” is selected, an author can use this menu option to invite one or more co-authors:
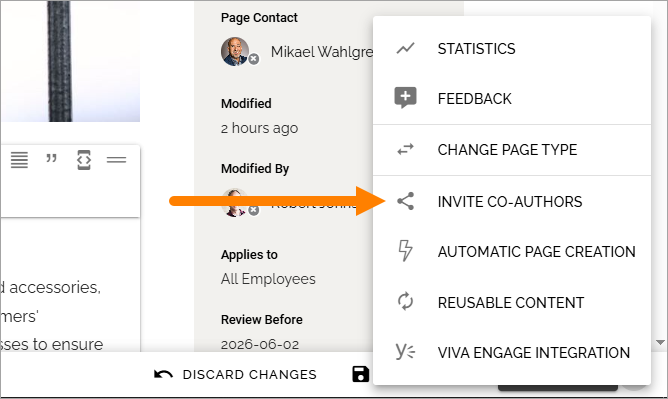
(Available options in the menu depend on the settings for the page collection).
Note that this is not temporary, the co-authors will be added to the page permissions as authors.
For more information about inviting co-authors, see: Invite co-authors
Channel settings
When you enable publishing to channels you can also choose at least one publishing channel to be required:
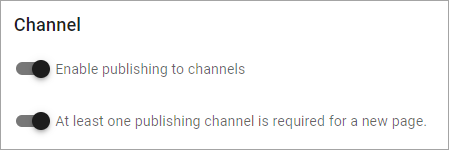
I you select this there must be at least one channel selected when a new page is created in the page collection, or the new page can not be saved.
Options for AI
When activating the AI option, the following settings are available for this page collection:
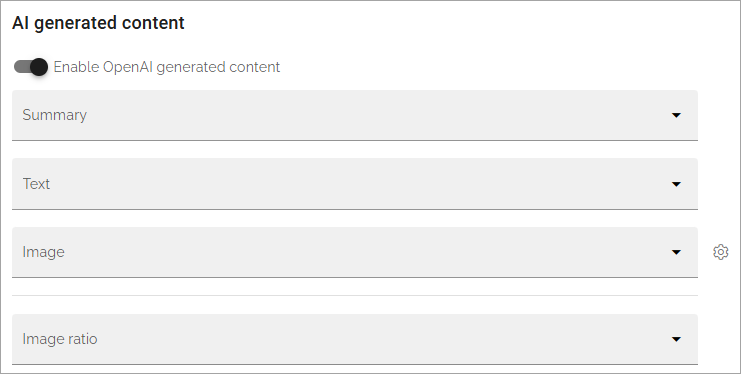
Summary: To activate AI functionality for page summary, select the appropriate summary property here.
Text: Likewise for text fields, select property to activate AI functionality.
Image: Dall-E is an AI option that can be activated (a tenant feature) and is then available as an image provider in the image picker. Select the image property used to activate the functionality.
Image ratio: You can also select image ratio for the Dall-E image, when clicking the cog wheel. Here you can also choose to use the image as background.
See the bottom of this page for information about how AI can be used in the RTF editor: Editing text with the RTF Editor
Important notes about semantic search
To put it very simple, semantic search makes it possible to type search strings similar to the way you would ask a colleague. Even if you don’t type the correct words, semantic search usually “understands” what you are looking for. The information must of course be available within Omnia. At the moment, semantic search can be available for pages (settings per page collection) and controlled documents (settings per document type). Other types of documents are not available for semantic search in Omnia, for now.
Very important! The semantic search will soon be developed further in Omnia but for now it does not support security trimming. Therefore, use semantic search only in page collections containing common information that anyone in the organization have permission to read.
An additional way of restricting access to information gathered by semantic search, is to use the permission group available for tenant permissions. For more information, see: Permissions for the tenant
Saving page collection settings
To save the changes to the page collection settings, you need to publish. You can’t save a draft, even if that option is present.