Using the work space for processes
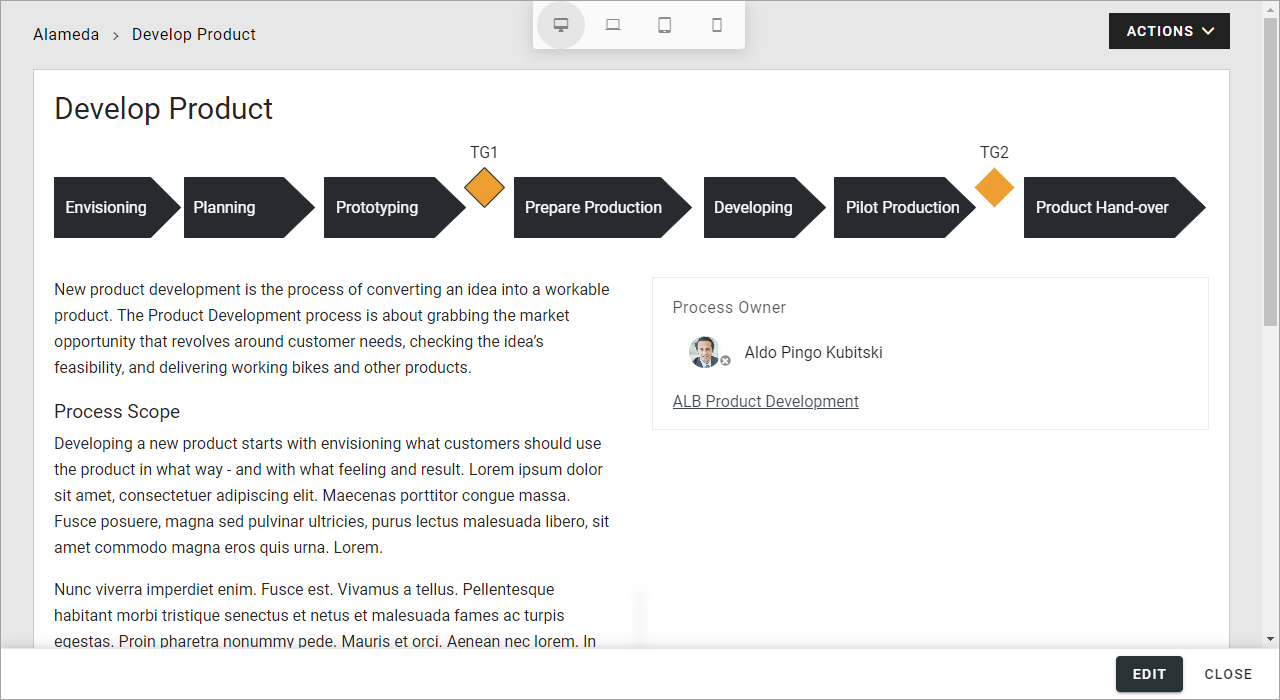
Three different modes are available. The Default mode is Preview where you can see the progress of your work. Here’s an example:
In Design mode you work with the graphic presentation - the drawing and the layout:
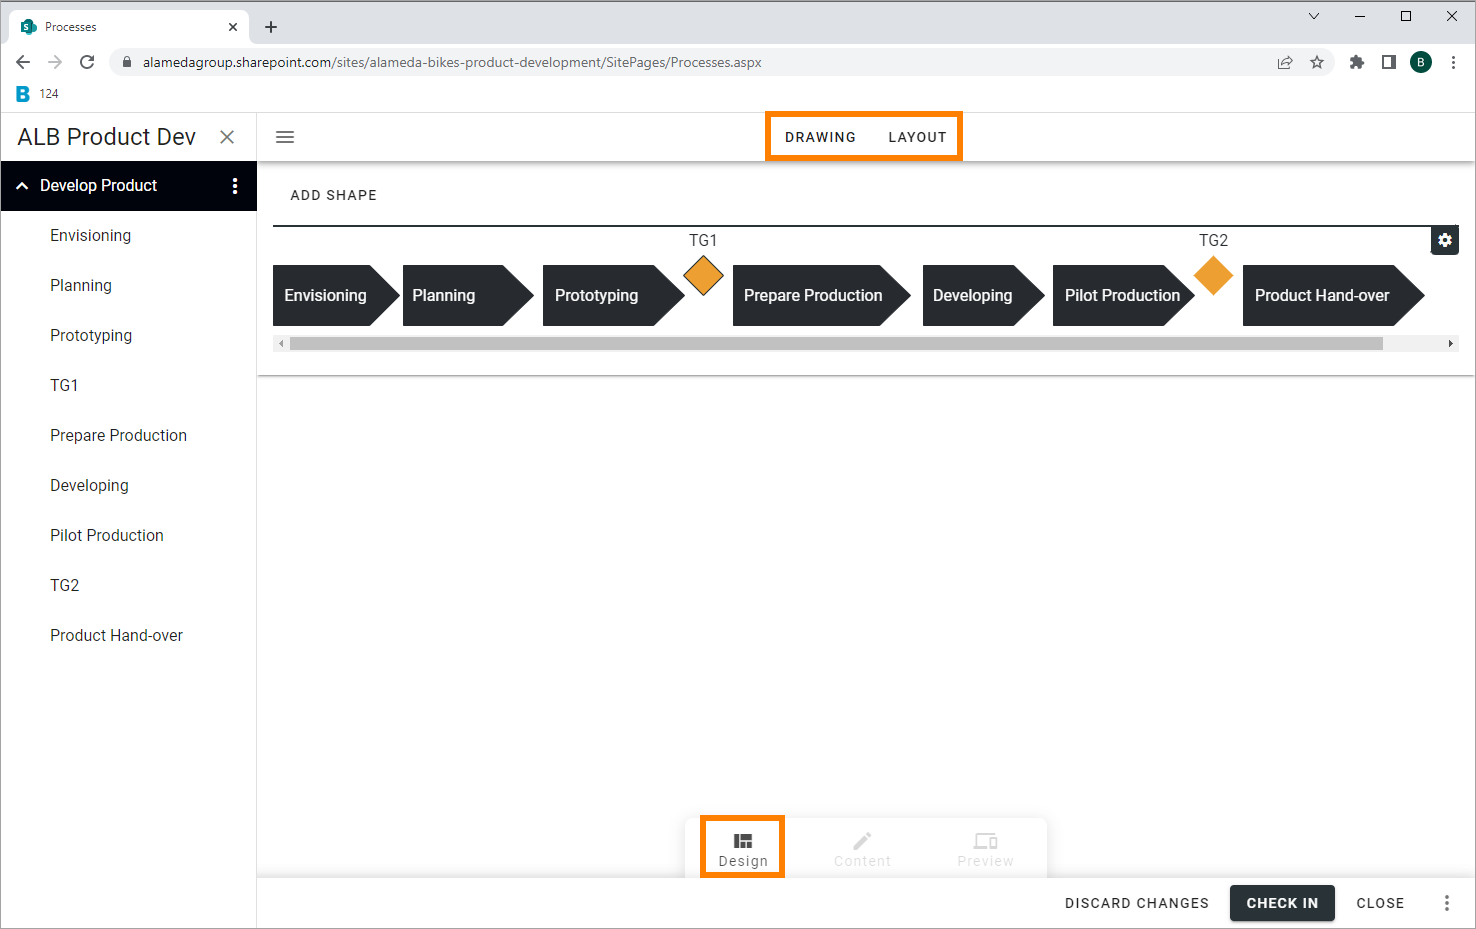
Here you work with the graphic presentation of the process, which can also serve as a navigation of the process. You can visualize the process and the process steps by adding shapes and/or upload an image and add clickable areas to that image. The Layout tab can be used for some changes or additions to the layout from the template, if possible (many parts of the layout will probably be locked).
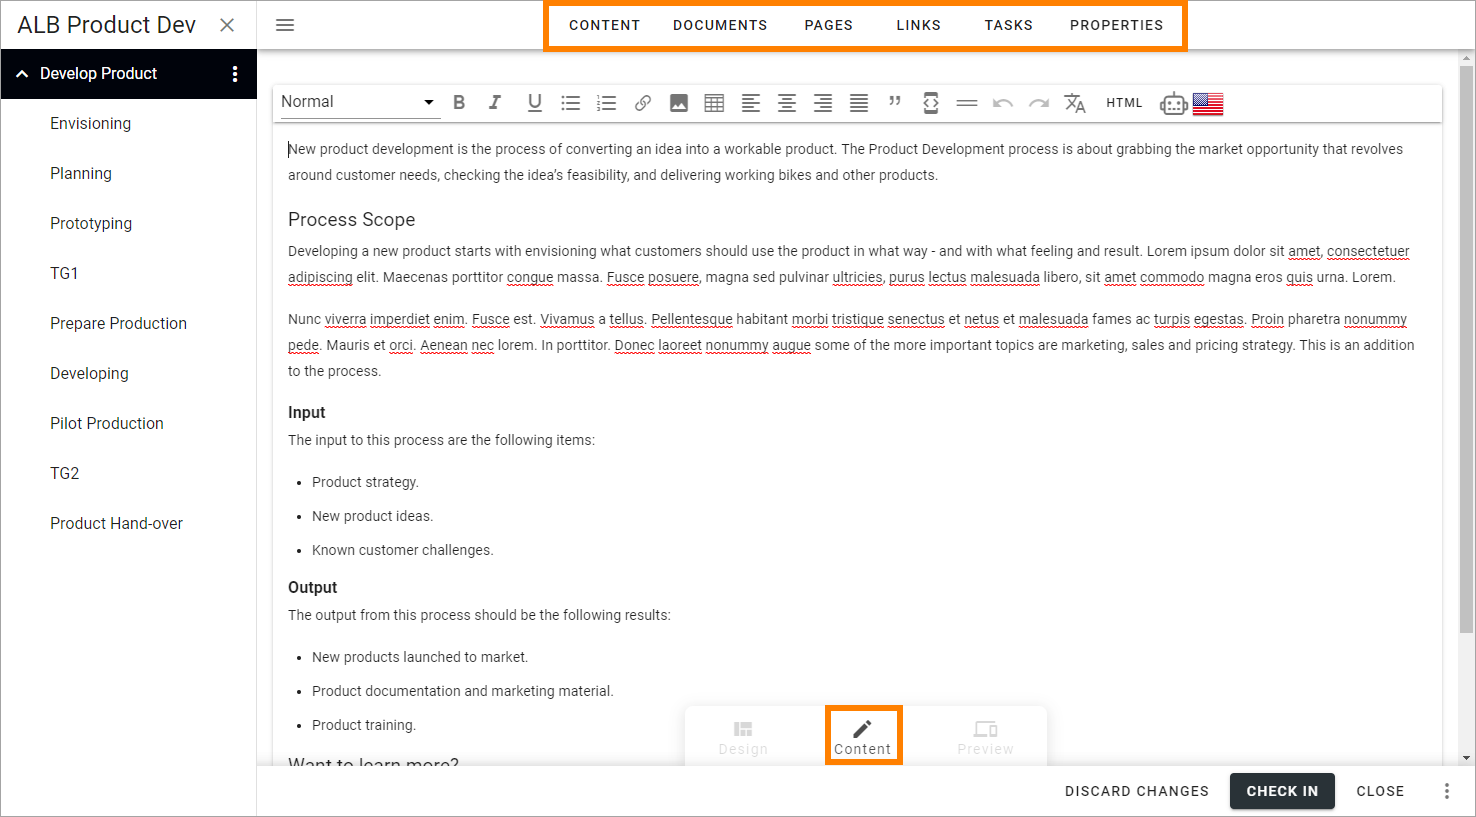
In Content mode you work with these tabs:
Regarding Properties, you set them for the whole process. Therefore, this tab is only available at the top level. All other tabs are available for all process steps.
Here’s a short overview of what to use the tabs for:
Content: Use this tab to add a description of the process or process step. You can usually use both text and images to do that.
Documents: You use this tab create a list of documents relevant to the process or process step, documents that users can read.
Pages: You use this tab create a list of pages relevant to the process or process step, pages that users can read.
Links: Here you can add useful links for users, for the process or process step.
Tasks: Use this tab to work with a To Do-list for the process or process step. Note that this is not Sharepoint Tasks, just a To Do list.
Properties: You use this tab to set the properties for the process. Available for the main level, the process, only.
See these pages for more information: