User types
All users in Omnia will be assigned a user type. User types are also used when adding Omnia users and when setting up dynamic groups. It’s also possible to create customized user profile cards for different user types.
Authentication settings are set per user type. See below for more information.
Settings for user profile completion is also done per user type. See below for more information.
If any user types for Omnia users has been set up so far, they are listed here, for example:

Use the dust bin to delete a user type, the pen to edit and the third icon to create a customized user profile card for the profile, if needed.
User type settings
These settings can be used when creating a new user type:
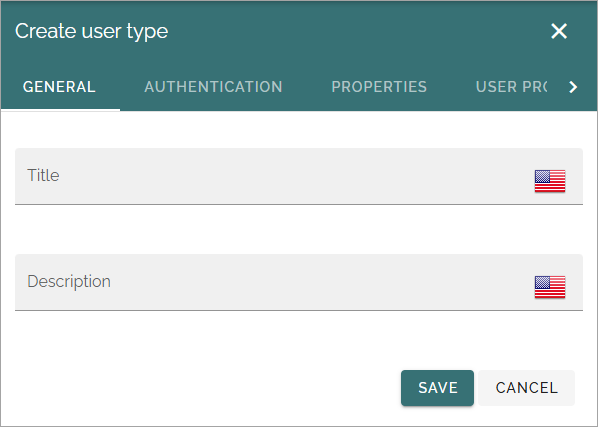
General
Add the title and description here (se image above).
Authentication
Here you can set the following:
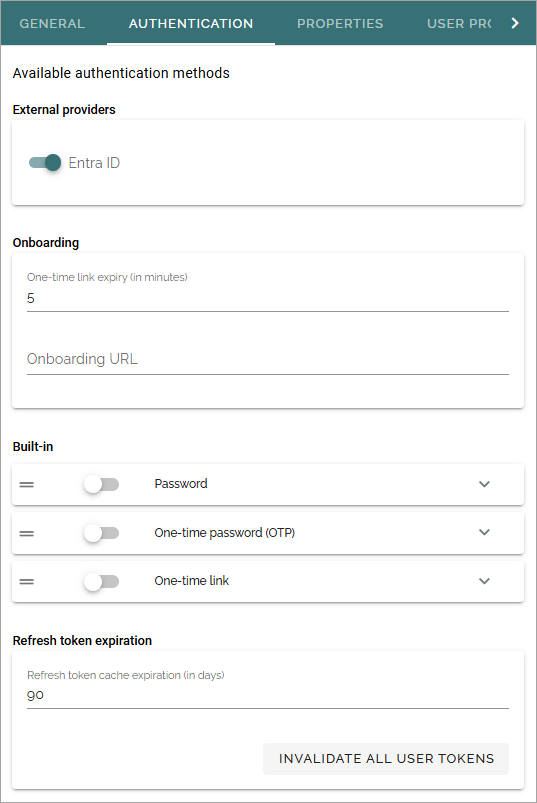
External providers: If there are more than one provider, make sure to select the correct one.
Onboarding: Set the expiration time for the one-time link and add the URL to the onboardring page, if needed.
Built-in: Select the authentication you want to use for this user type and for more options, see below.
Refresh token expiration: Used by mobile apps only. Set the number of days that can pass until a user is forced to log in again.
INVALIDATE ALL USER TOKENS: When permissions for Omnia has been changed, users need to log out and log in for the changes to take effect. You can click this button to force a log out from Omnia for all users. Important information on this below.
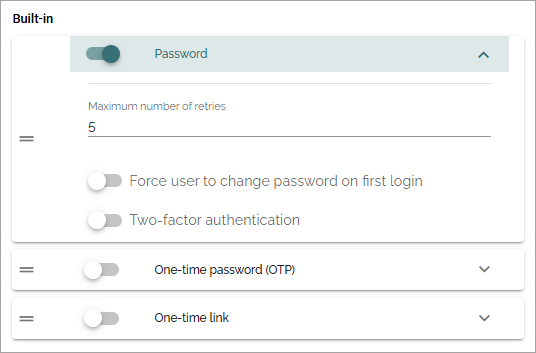
When expanding one of the options for “Built-in”, additional settings are available, for example:
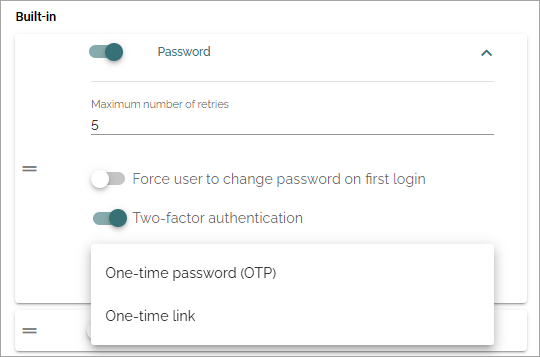
If “Two-factor authentication” is selected, You must select one of the other authentication methods available, as the second authentication.
More on Invalidate all user tokens
If the button INVALIDATE ALL USER TOKENS is clicked to force a log out from Omnia for all users, only Omnia is affected, not Sharepoint, Office apps, mail or anything else outside Omnia.
If an editor or author is working on a page in Omnia, the user will be logged out but content added to a page, even if it’s not published, is automatically saved quite often, to minimize content lost.
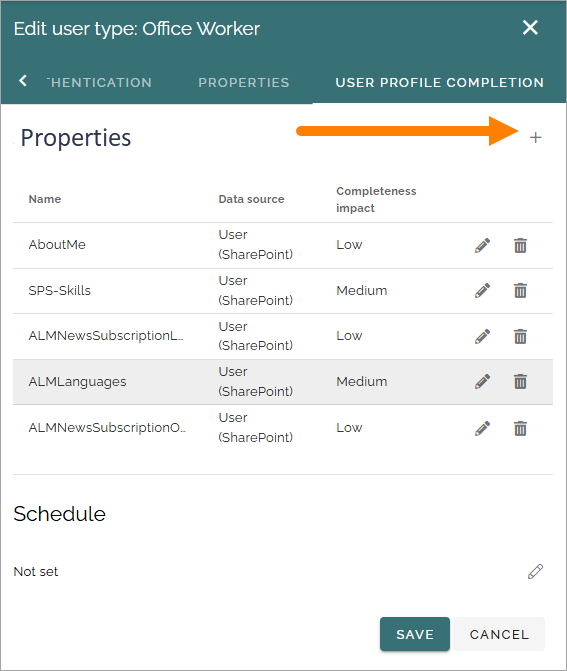
Properties
On the Properties tab, something like the following is available:

Here you select the properties to be available for this user type. A few properties are mandatory and can not be deselectedy.
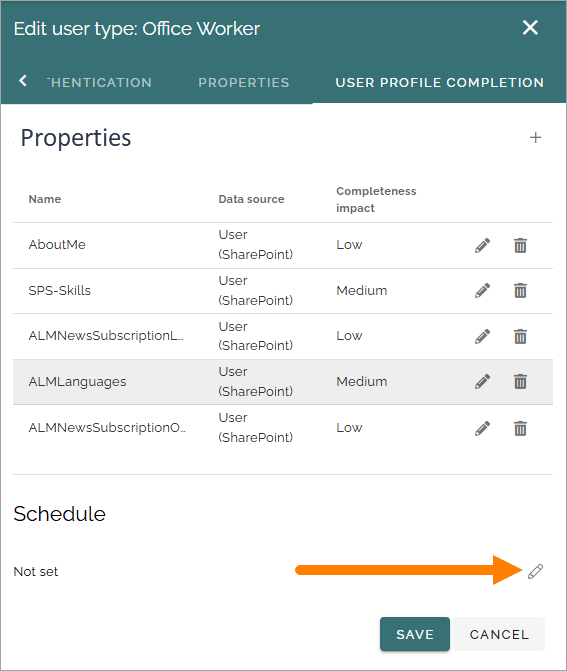
User profile completion
All edits can be done on the user profile card. On this tab you work with the settings for profile completion. (The previous, classic, functionality for profile completion is still available).
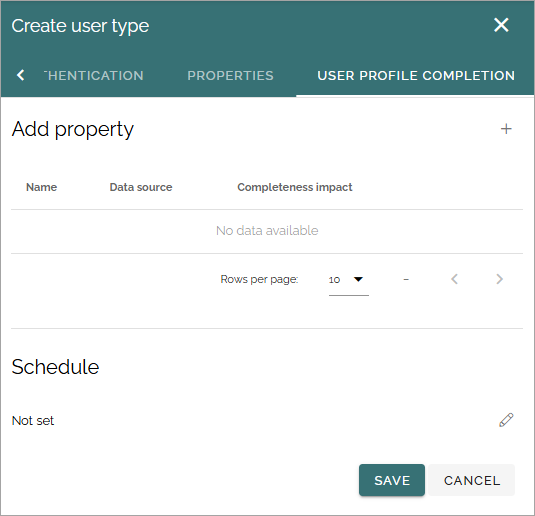
The selected properties are listed here (in a new user type, this list is empty). Use the pen to edit the settings and the dust bin to remove a property from the list. These properties must also be present in the card layout for the follow up on profile completion to be meaningful. See below for more information on custom profile card layouts.
Add a property
To add a property to this list, do the following:
Click the plus.
The following settings are available:
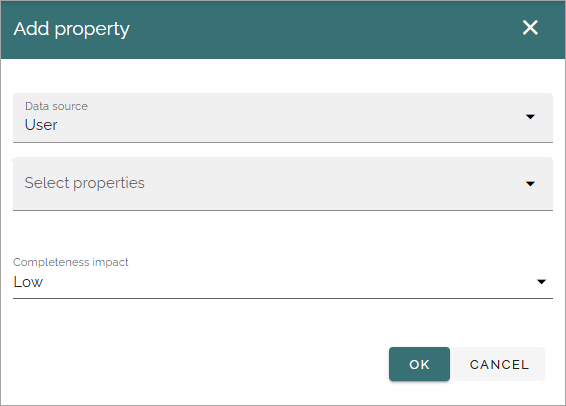
Data source: Select the data source to get the properties from; User - meaning Omnia user, User (Microsoft Graph) or User (Sharepoint).
Select properties: Select the property here.
Completeness impact: You can set the completeness impact to Low, Medium or High. When the completeness impact is calculated, Low is 1, Medium is 2 and High 3. The aggregated points are then divided with the total points possible, to yield the percentage.
When editing the settings for a property (using the pen), an additional setting is available:
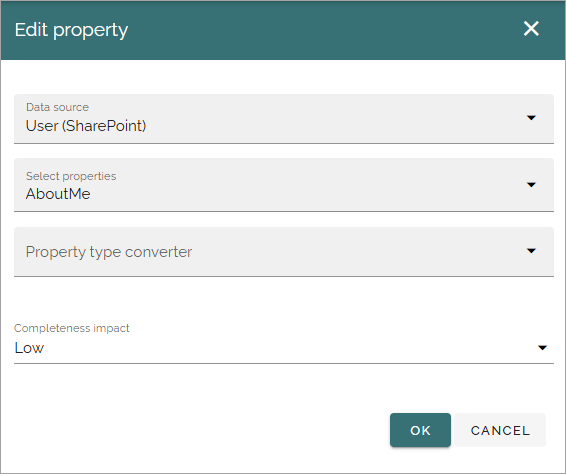
Property type converter: If needed, this option is shown. Use it to select property type to use for the selected property. Several properties can for example be either Text or Multi-value text, but that’s just one simple example.
Schedule
You can schedule the check for how complete the user profle is, according to the settings for the user type. Click the pen to set or change the setting:
You can set the schedule to Never (meaning not set), Daily, Weekly or Monthly.
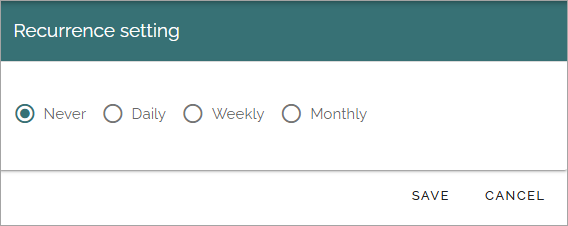
The check is executed when the page containing the User profile progress block is updated.
For more information about the block, see: User profile progress
An action button can be used to open the user’s profile card for editing, see the heading “Strengthen profile”, on this page: Action button
Note! The action button “Strengthen profile legacy” is used for the older Strengthen profile functionality.
Create a custom user profile card
You can create a custom user profile card for each user type if needed, and you can create different layouts for private card view and public card view. A private card view is simply when a user looks at his or her own card, a public card view is what everyone else can see. In Omnia 7.7 and later, the private view of the card can be used to edit the information shown in the public view.
To work with the user profile card layout, click this icon:
You work with the layout for the cards the same way as other layouts in Omnia, see: Working with layouts
Of course, just a few of the available blocks makes sense to use here, but that is up to you.
Here’s an example of a user profile card layout (shown in edit mode):
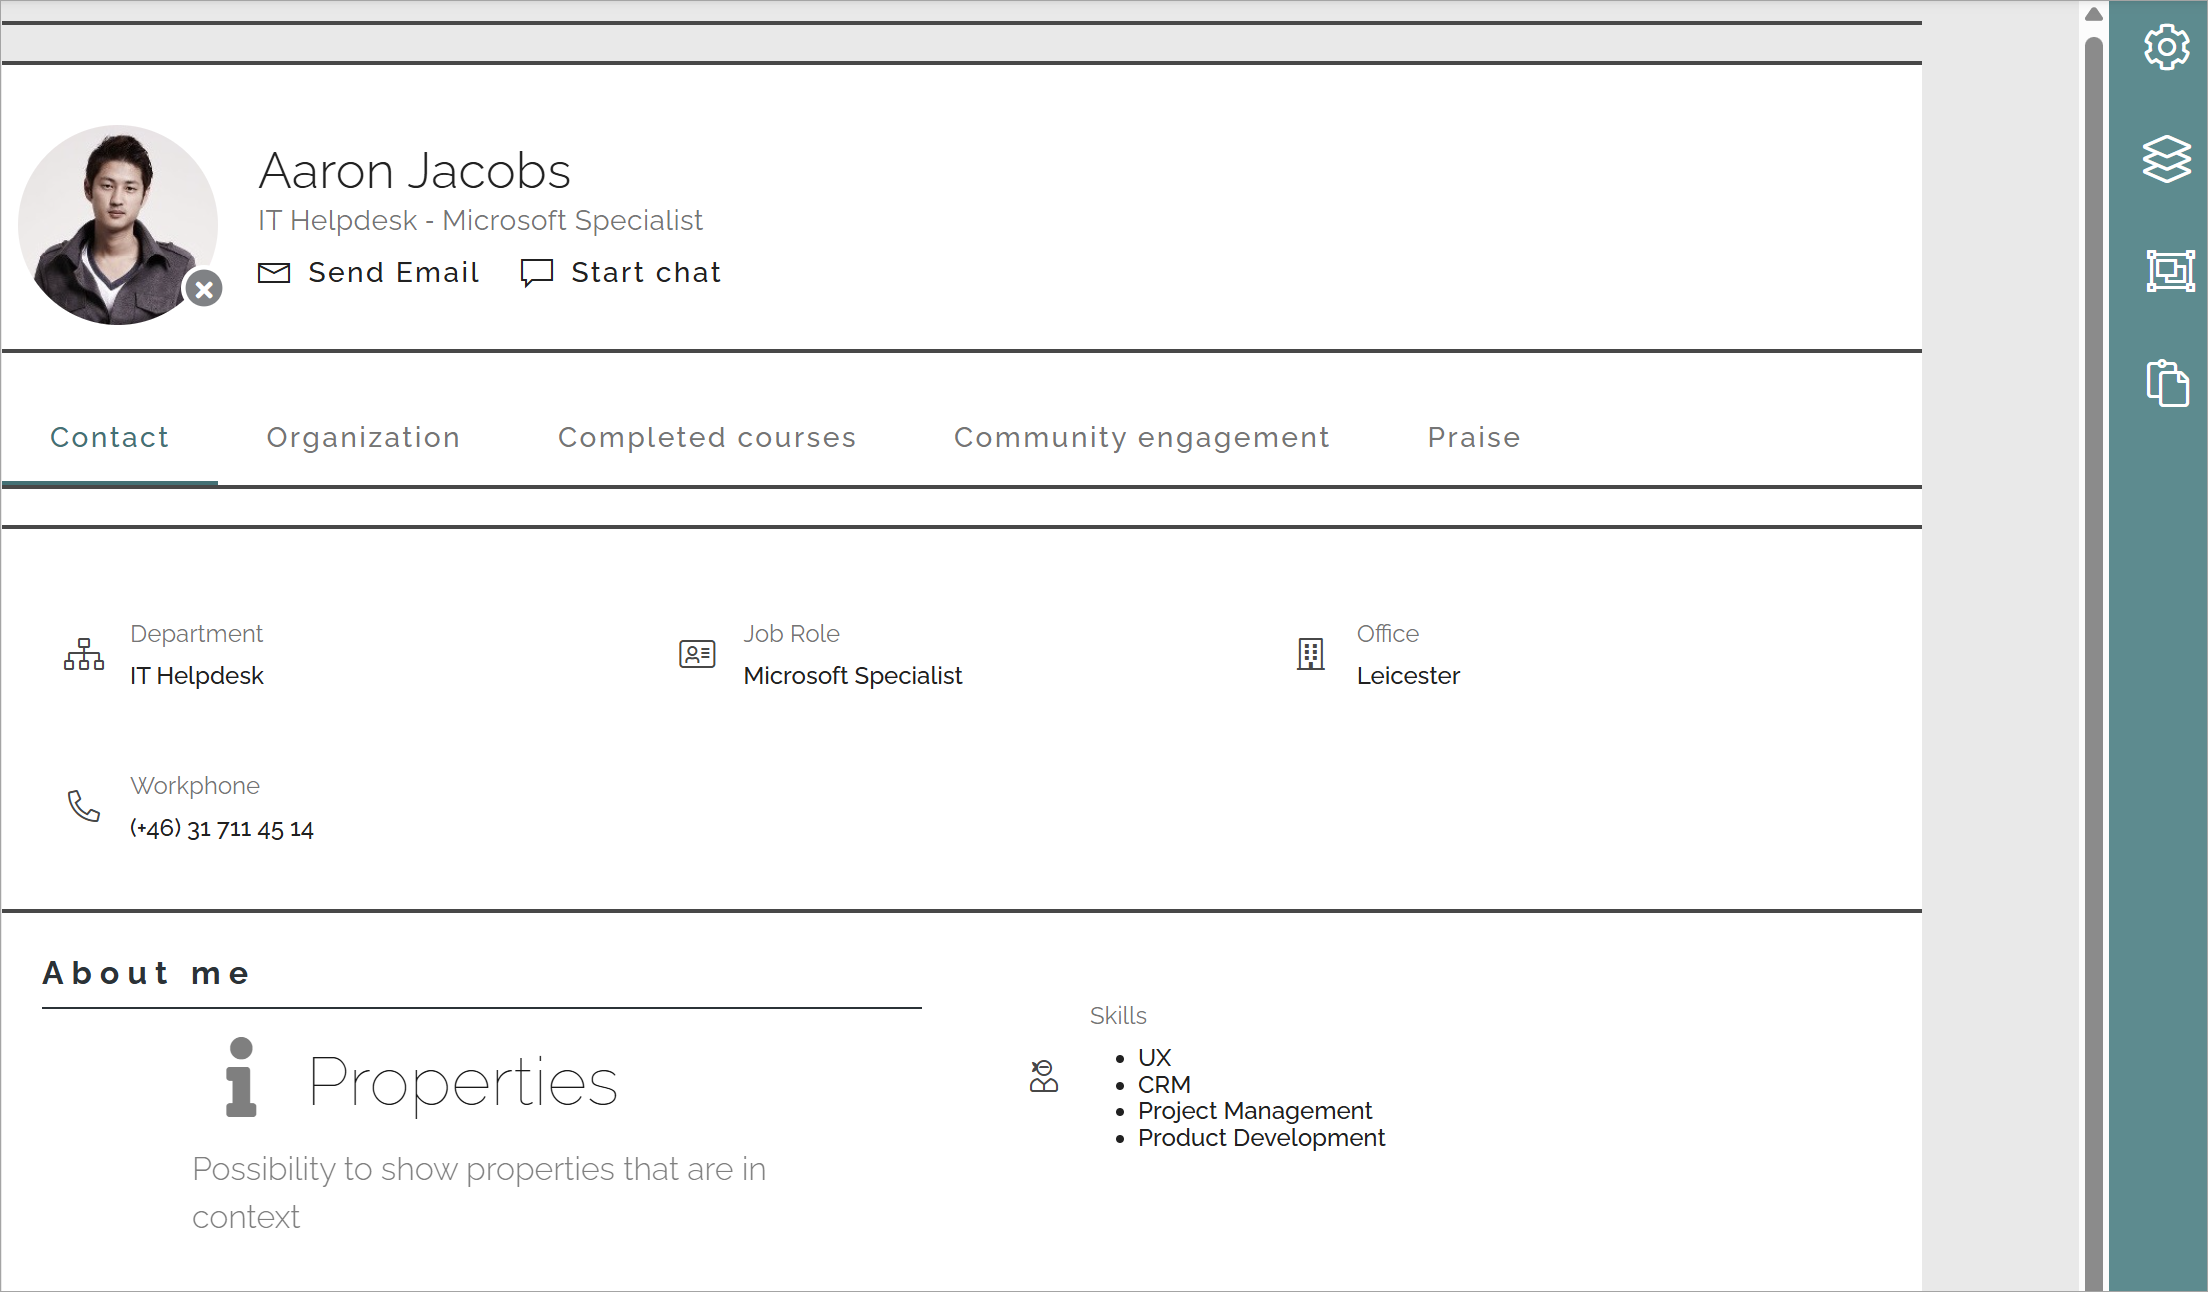
At the top, a User information block is added. Next, a tab section is added, for navigation purposes, for five tabs with information. The information that should be available is handled by adding blocks to the layout.
Preview a profile card
You can preview the card layout for different users:
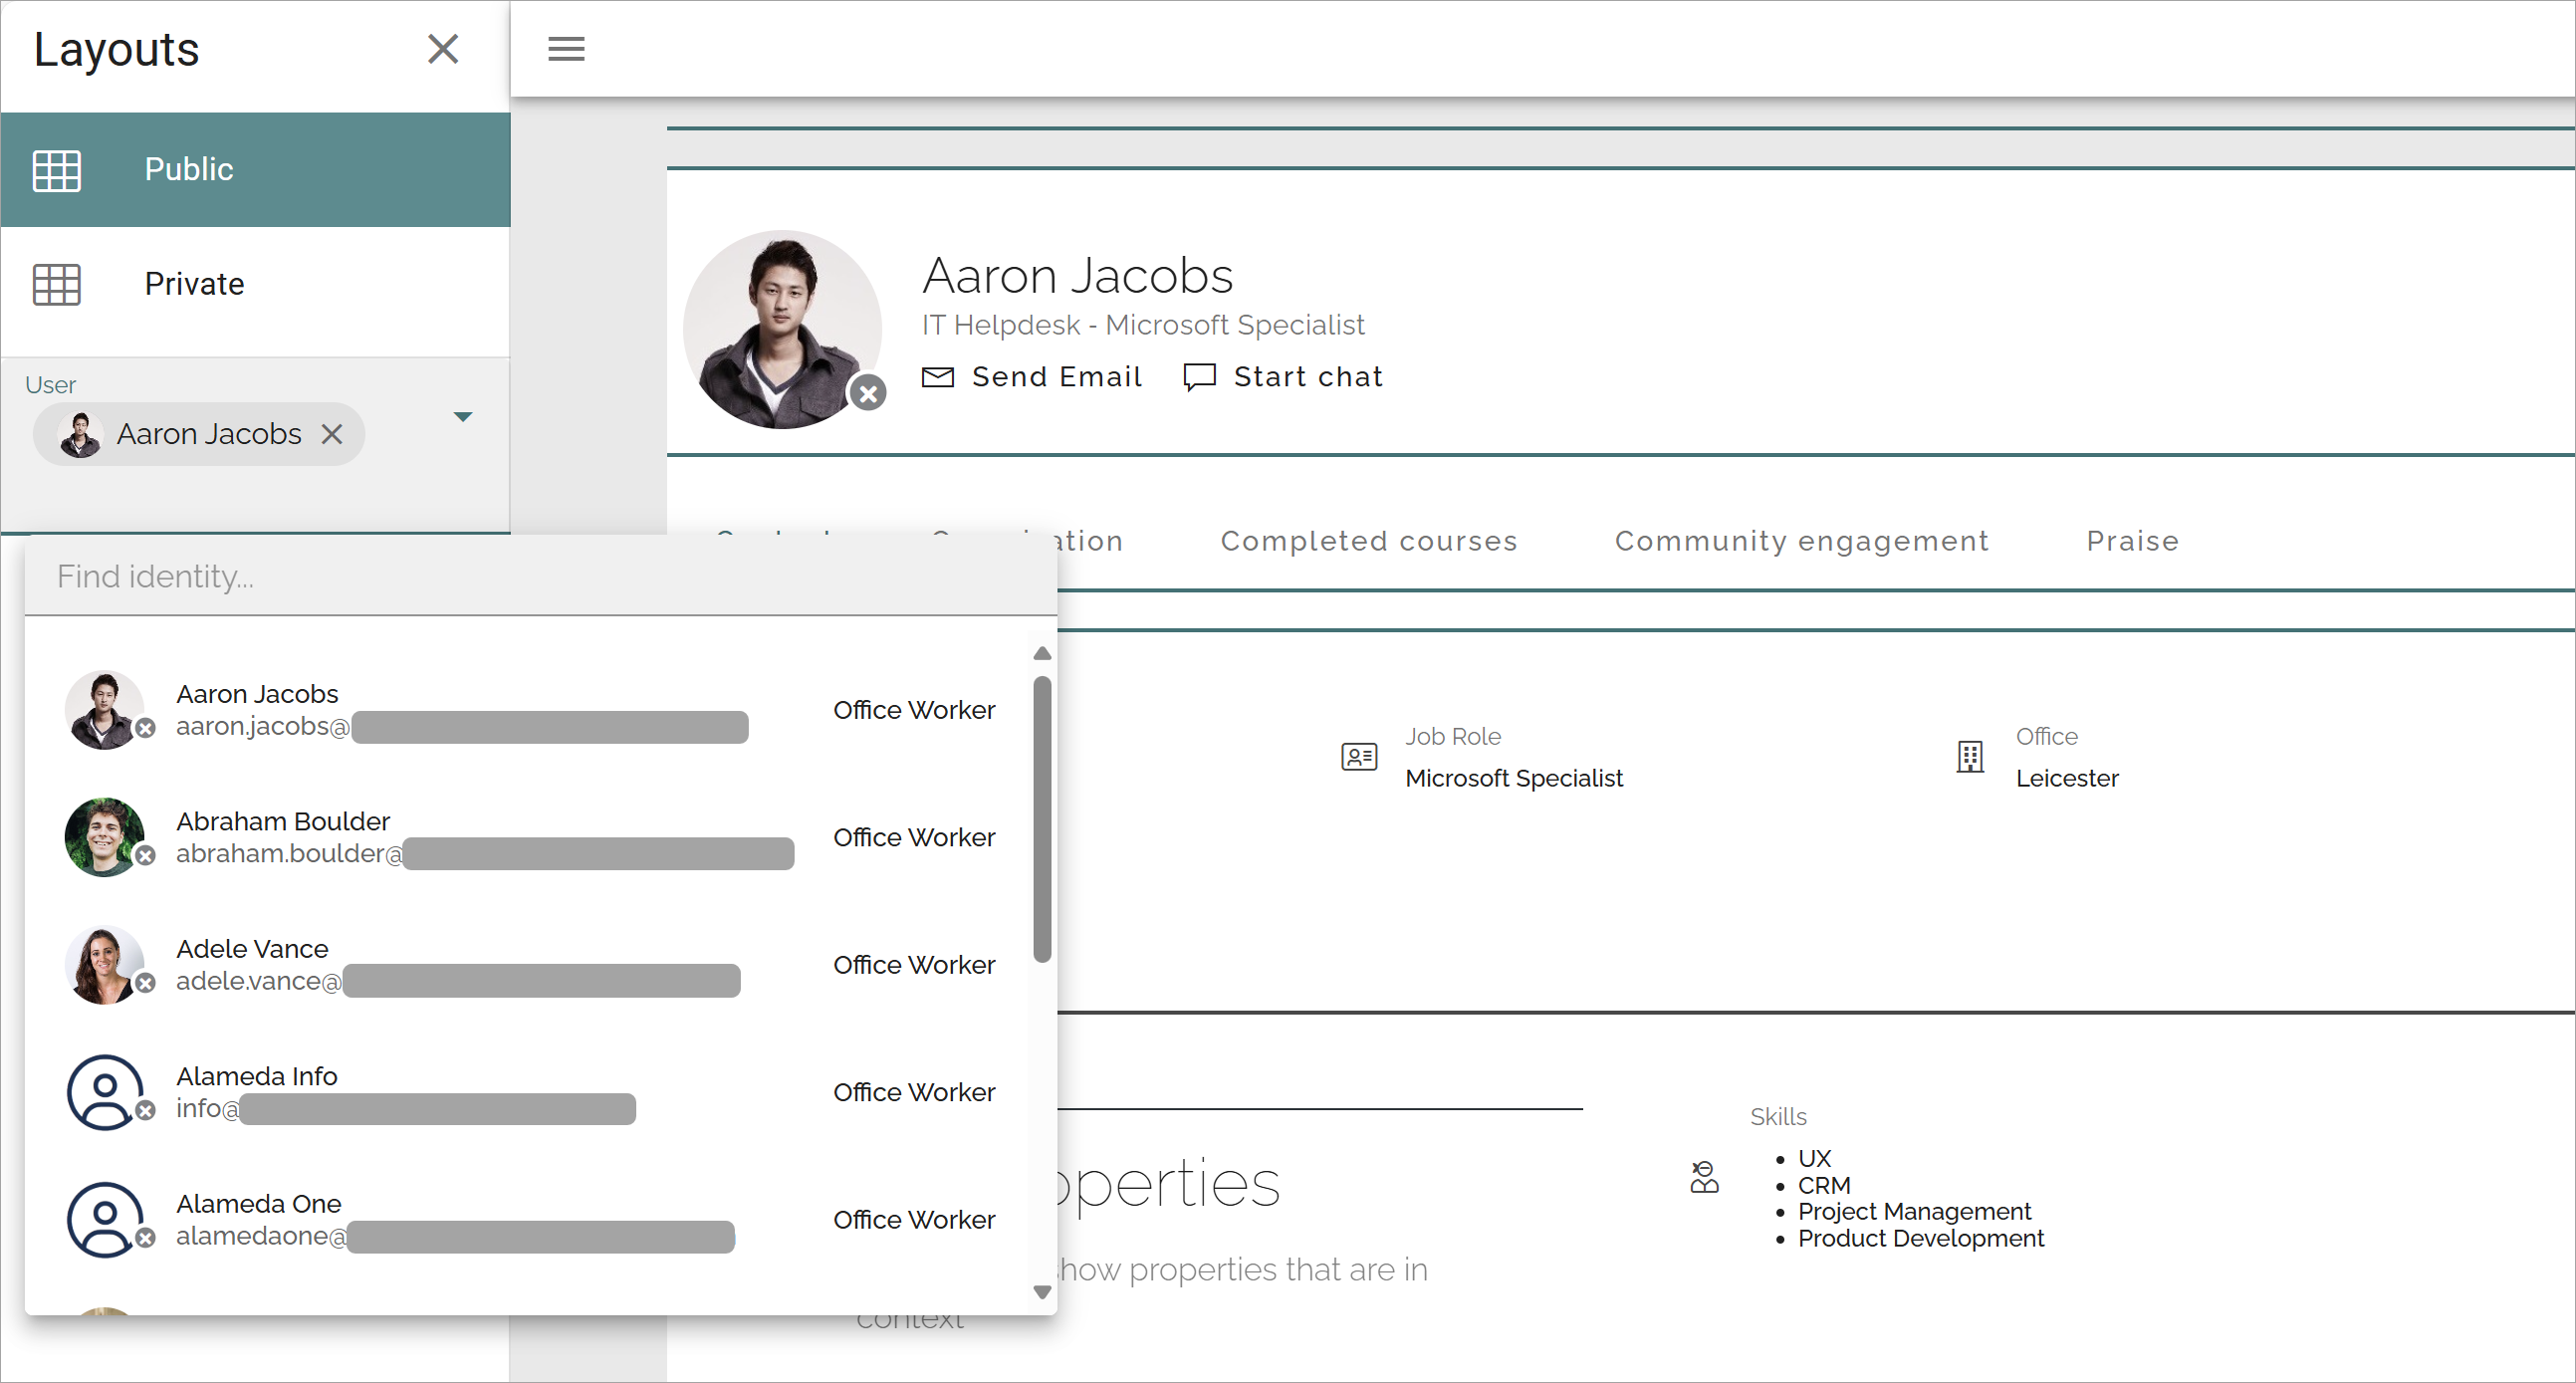
Important note! When you preview a colleagues card, all permissions are valid, meaning you can only see what YOU have permissions to see, not what the user has permissions for.
Profile card - user edits
It’s up to each user to edit the profile card. On this page you can see how it works: Edit your user profile card