SharePoint user profiles sync
Use these advanced settings to make sure person properties are synchronized from Entra ID to SharePoint. (This option was in earlier Omnia versions called “Azure AD Sync”.)
Prerequisites:
The default label in the term store must be the same as the string in Entra AD.
The tenant feature “App-only read access to SharePoint termstore” must be activated.
Note! This option is not applicable in Omnia on-prem.
These settings and options are available here:
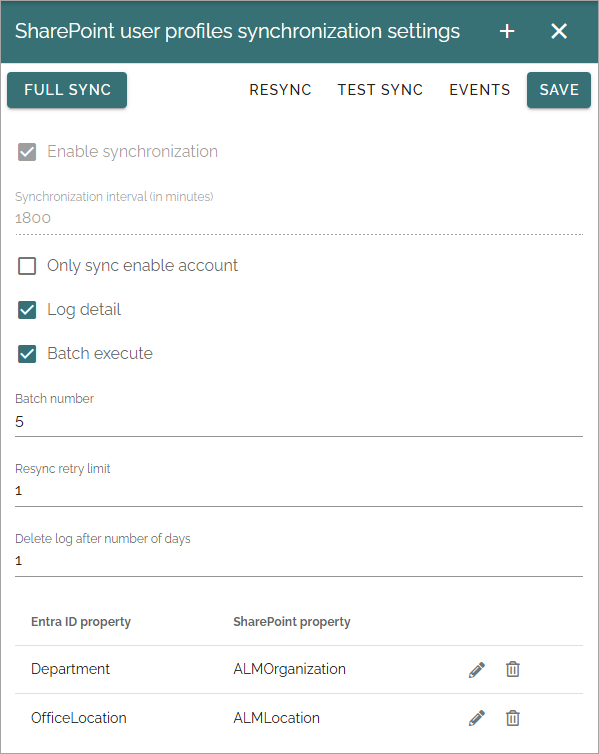
FULL SYNC: Click this button to execute the synchronizations set up (listed at the bottom). If you select “Enable Entra ID Synchronization” and set and interval, you don’t have to click this button. The synchronization is then executed with the interval set.
RESYNC: Use this button to open the Resync window, if needed. See below for a description.
TEST SYNC: This is an option suitable for administrators to test synchronization for a limited number af users. Setup the sync to test as described below.
EVENTS: Click this button to access logs from the synchronizations.
Enable synchronization: Select this option to enable the synchronization.
Only sync enable account: To only sync enabled accounts, select this option. Otherwise all, even disabled accounts, are synced.
Log detail: Use this if you have problems with the synchronization. In the details you will hopefully find out what’s wrong.
Batch execute: This is an advanced option if you have a very long list of users - several hundreds and above. Contact you provider/consultant for help when using this.
Batch number: When you have selcected “Batch Execute” you use this field to set the number of users that should be synchronized each time.
Resync retry limit: Here you can set the number of times the system will try to sync the user(s).
Delete log after number of days: Set the number of days the log file will be available. Default: 14 days.
At the bottom the synchronizations that has been set up are shown. By clicking the pen you can edit the same settings as when the synchronization was set up (see below).
To delete a synchronization from the list, click the dust bin.
For a scheduled synchronization you also need to add an account in the Security settings (Secrets), see: Permissions for the tenant
Setup a new synchronization
To set up a new synchronization, do the following:
Click the plus.
Use the following settings:
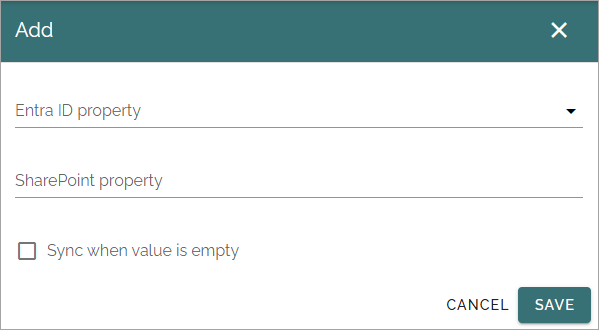
Entra ID property: Open the list and select the Entra ID property to synchronize.
SharePoint property: Type the name of the SharePoint property to synchronize to.
Sync when value is empty: Normally empty fields are not synchronized from the AD. If you want to do that, select this option.
Save when your finished here.
Save your changes in the settings window.
Events
In the list each synchronization is described with Type, Status and Start- and End time.
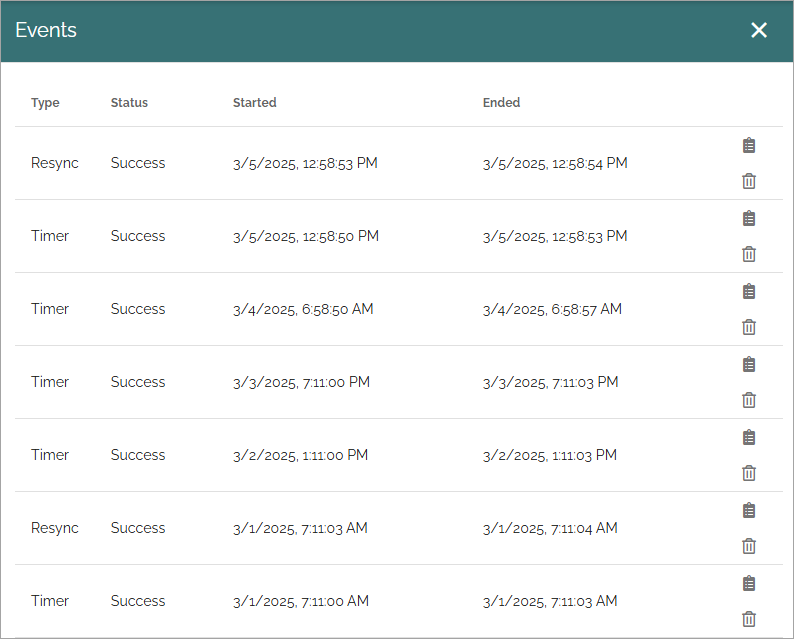
The top icon for each post will show more details.
Resync
If syncronization for some users didn’t work, the RESYNC button is shown.
The system will try to sync the user(s) the number of time set for “Resync retry limit”.
To display more information, click RESYNC and the following is shown:
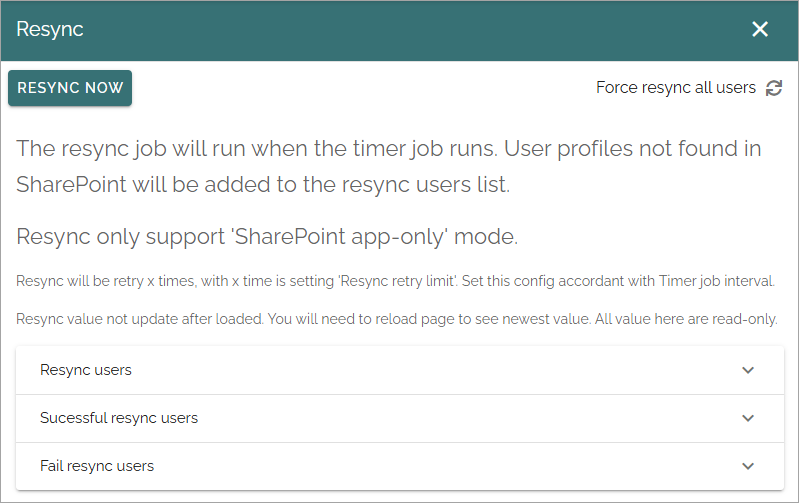
Read the text in the window carefully.
Here you will find more information on the resync job and you can see a list of users that the syncronization worked for, and another list of users it did’nt work for.
There are three lists available:
Resync users: Lists the users that the system will try to resync.
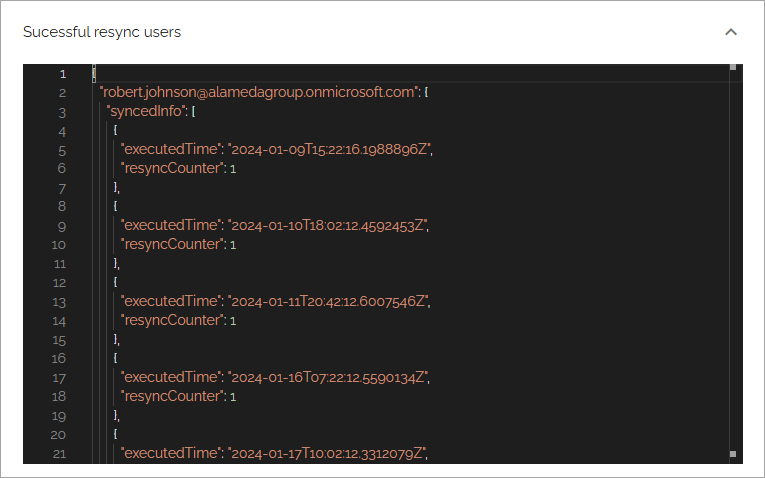
Succesful Resync users: Lists all users that was succesfully resynced.
Fail resync users: Lists all users that has been resynced but where the resync was not succesful.
The information in the lists can look like this (image from a test environment):
The button RESYNC NOW can be used to execute the sync job immediately.