Setup AI
Currently, all AI services in Omnia require Azure OpenAI to be set up. To deploy semantic search, you must also set up Azure AI Search.
Note! Update of this page is ongoing (really just started). Will updated soon.
Azure OpenAI
Step 1: Browse into your subscription in the Azure Portal and find the Azure OpenAI service.
Step 2: Click on ‘Create Azure OpenAI’.
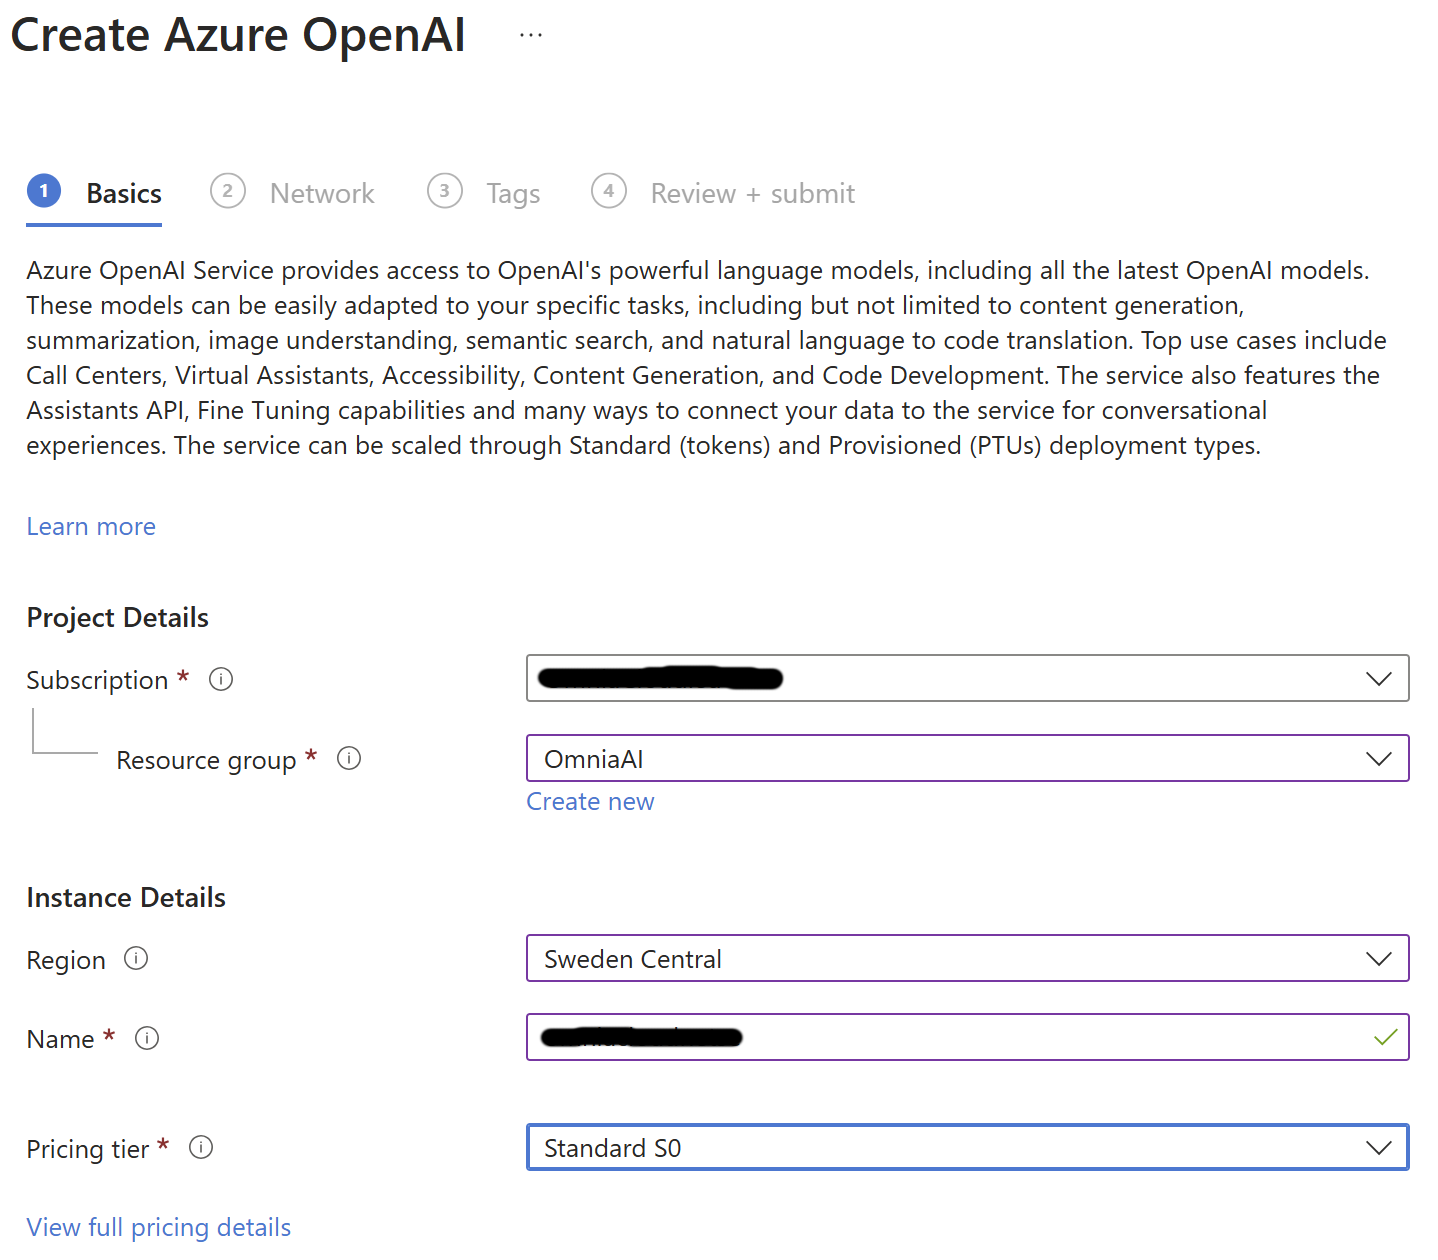
Step 3: Create a new OpenAI instance in your subscription by selecting a region and a name for the instance. We currently recommend choosing East US 2 or Sweden Central due to the availability of AI models in these regions. We recommend using your unique domain as a basis for the service name for better identification (Domain: contoso.com > Name: constosocom).
Note
Different regions have different AI models available. Check out this page for more information: https://learn.microsoft.com/en-us/azure/ai-services/openai/concepts/models.
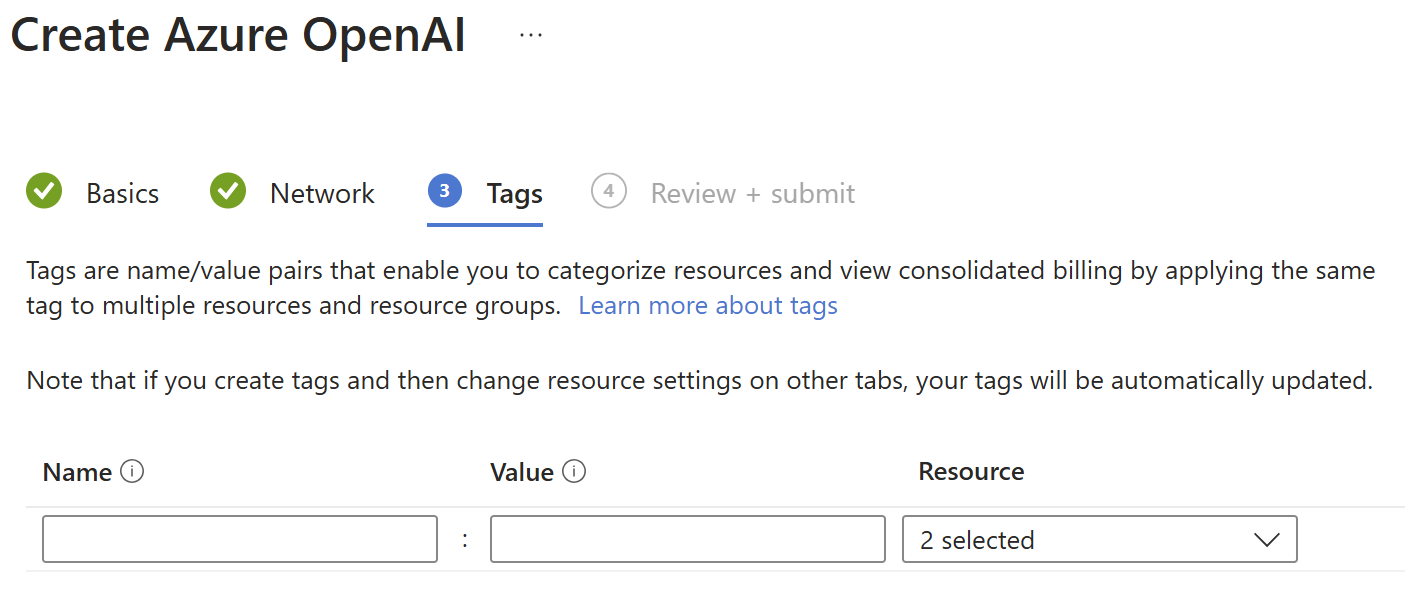
Step 4: If you have no specific requirements, you can keep the default of the rest of the settings.
Step 5: Review the settings and submit the deployment request.
Step 6: The service may take some time to become available. Why not grab a coffee while you wait?
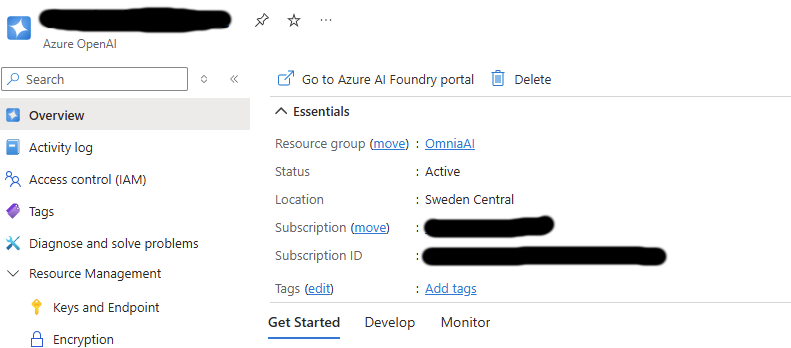
Step 7: Once the service is up and running, you can browse into it an click on ‘Go to Azure AI Foundry portal’.
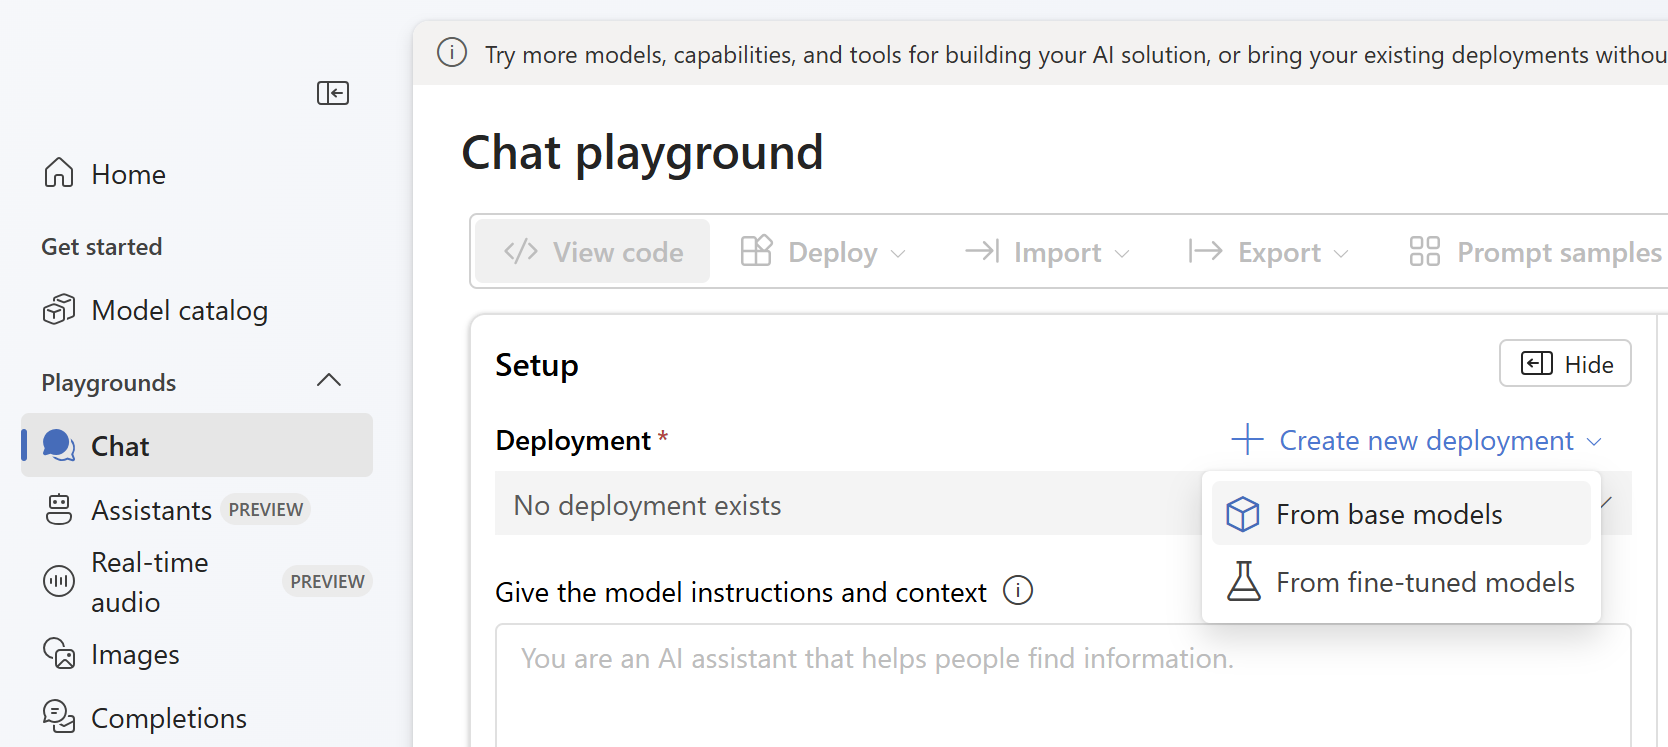
Step 8: Browse to the Chat Playground and create a new deployment from base models.
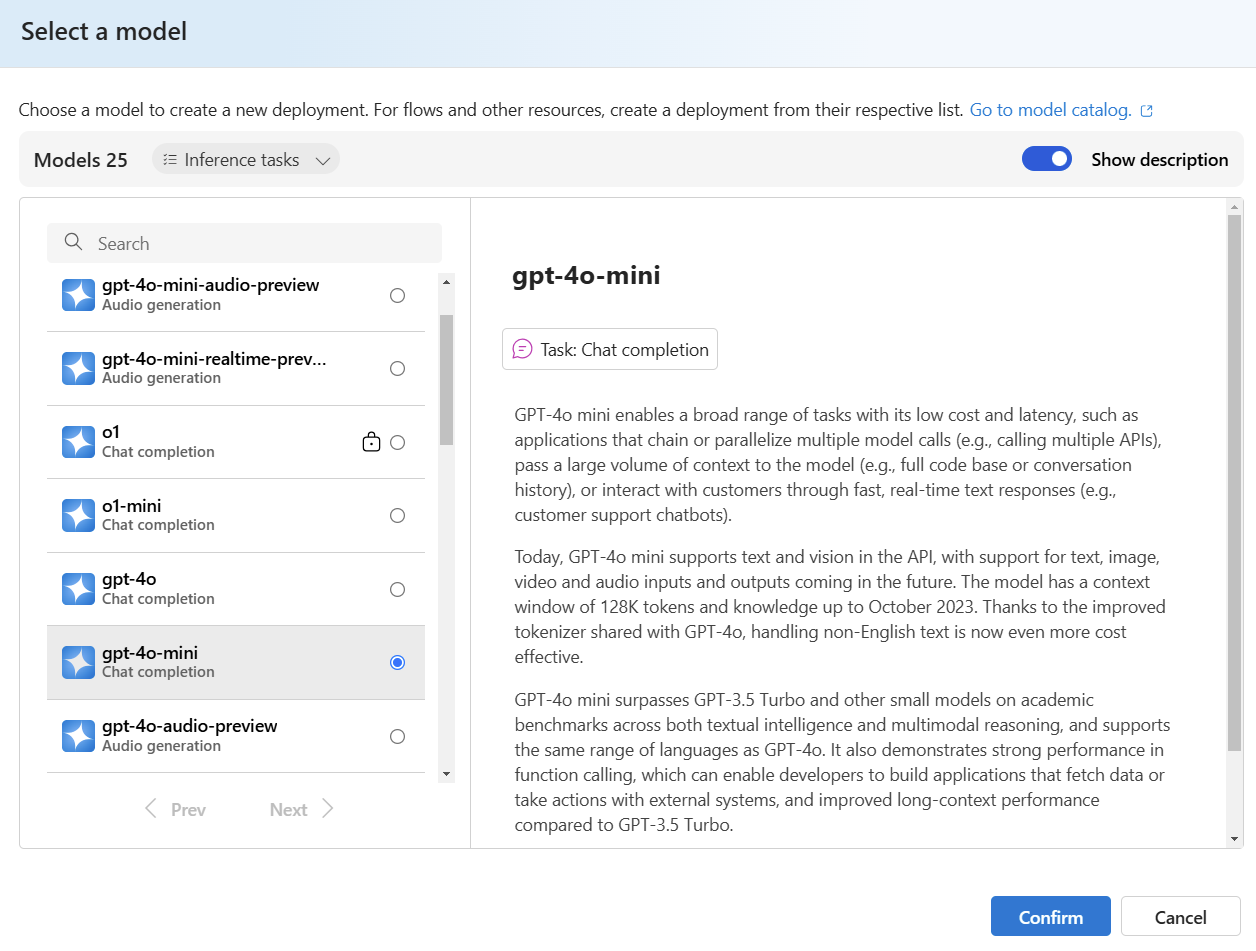
Step 9: Select the model.
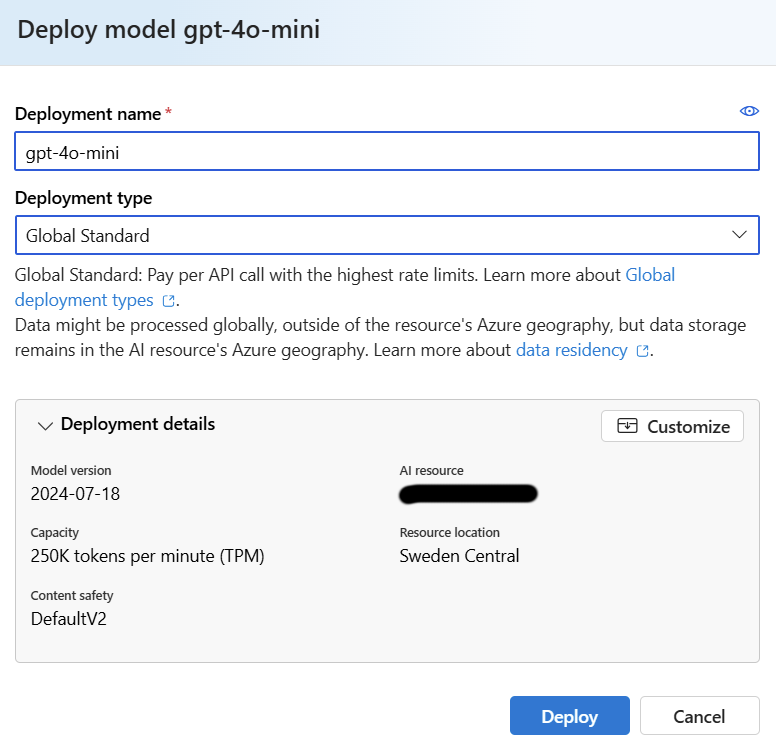
Step 10: Add a deployment name. We recommend using the model name for better identification.
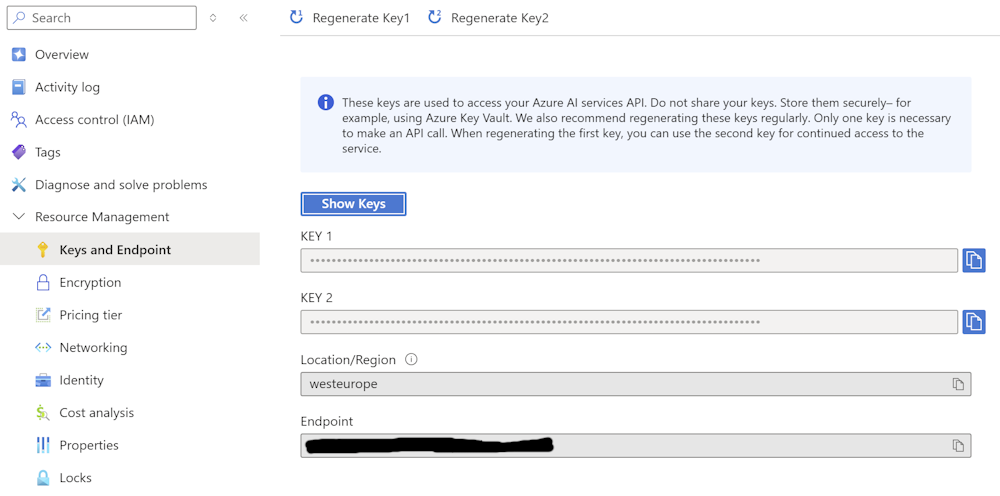
Step 11: Browse to ‘Keys and Endpoints’ in the OpenAI service. Copy ‘KEY 1’ and ‘Endpoint’ to notepad.
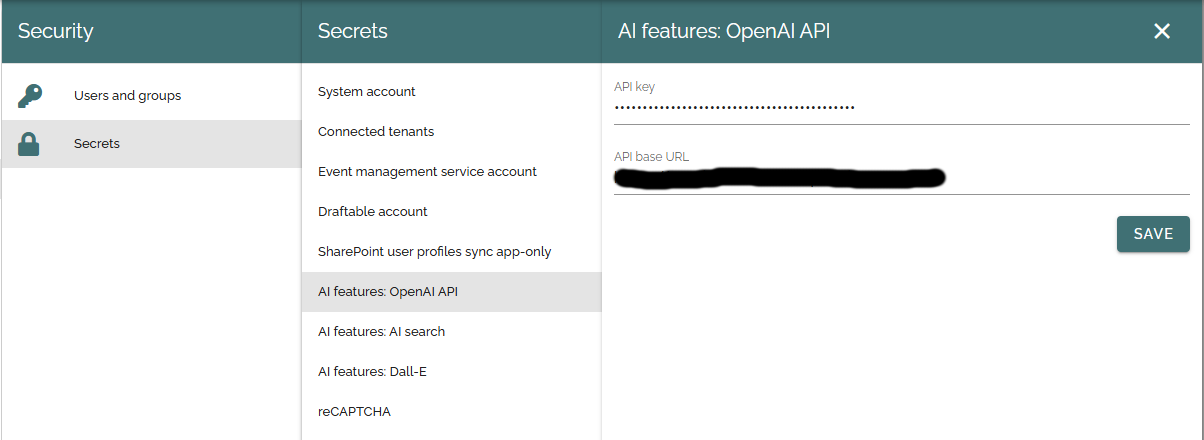
Step 12: Navigate to Omnia Admin > Permissions > Secrets > AI features: OpenAI API and paste the key and url.
Azure AI Search
Note
This service is required only if you plan to deploy Semantic search.
Step 1: Browse into your subscription in the Azure Portal and find the AI Search service.
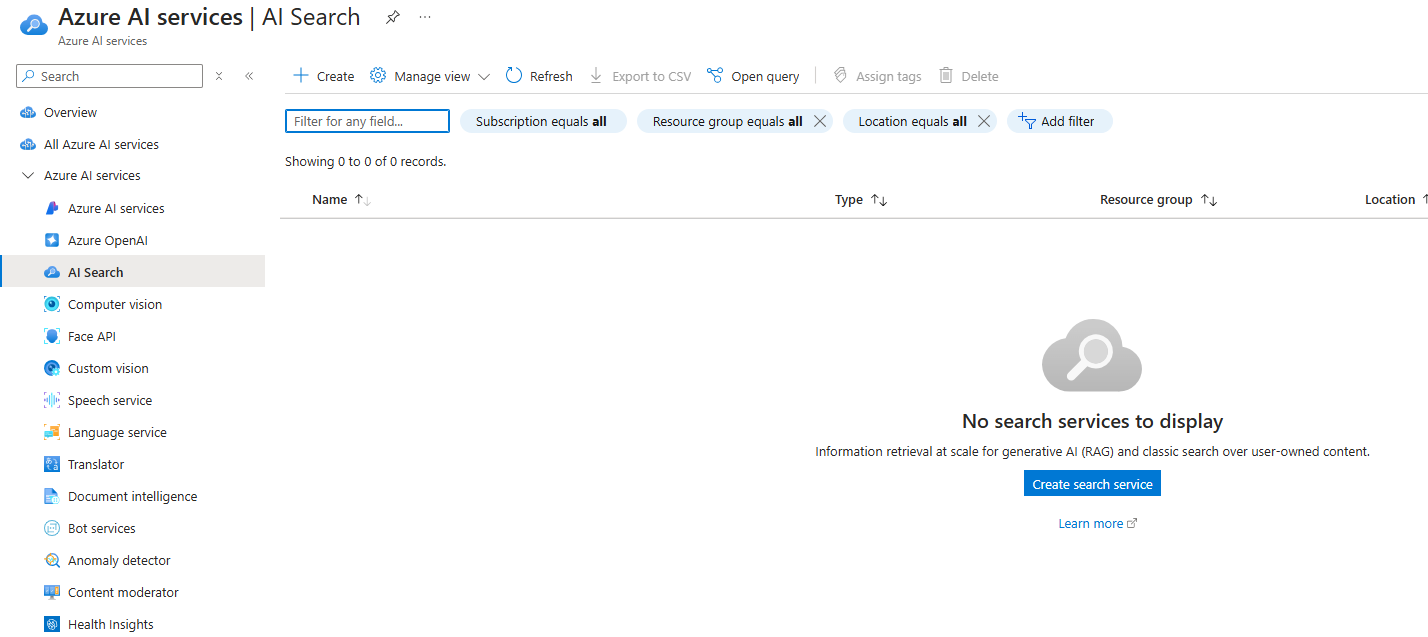
Step 2: Click on ‘Create search service’.
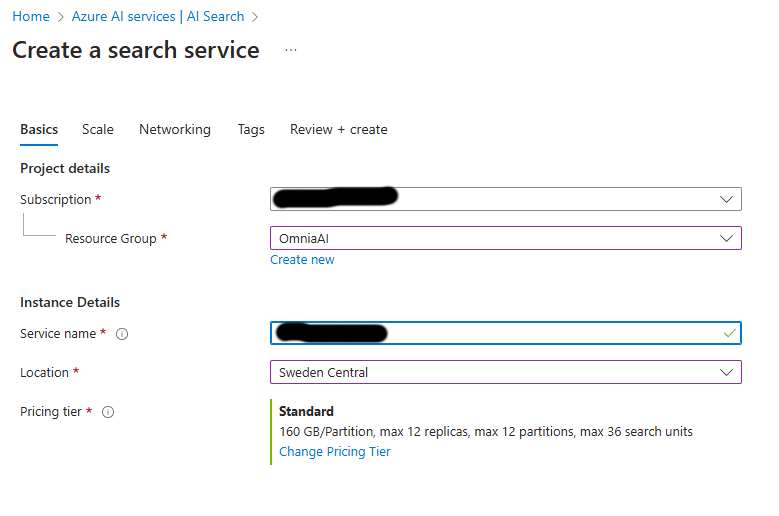
Step 3: Input a service name. We recommend using your unique domain as a basis for the service name for better identification (Domain: contoso.com > Name: constosocom).
Step 3: Choose a location for the service and select a pricing tier. We recommend the Standard pricing tier.
No new image?
Step 4: If you have no specific requirements, you can keep the default settings for ‘Scale’, ‘Network’ and ‘Tags’.
Step 5: Review the settings and create the service.
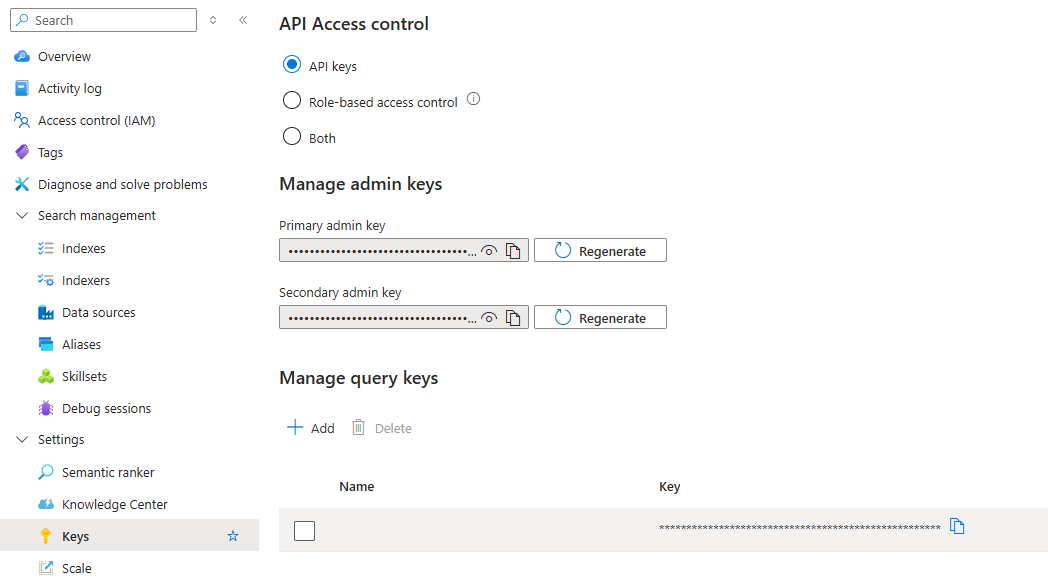
Step 6: Once the service is up and running, browse to the settings section of the service and ‘Keys’.
Step 7: Copy the ‘Primary admin key’ to notepad.
No new image?
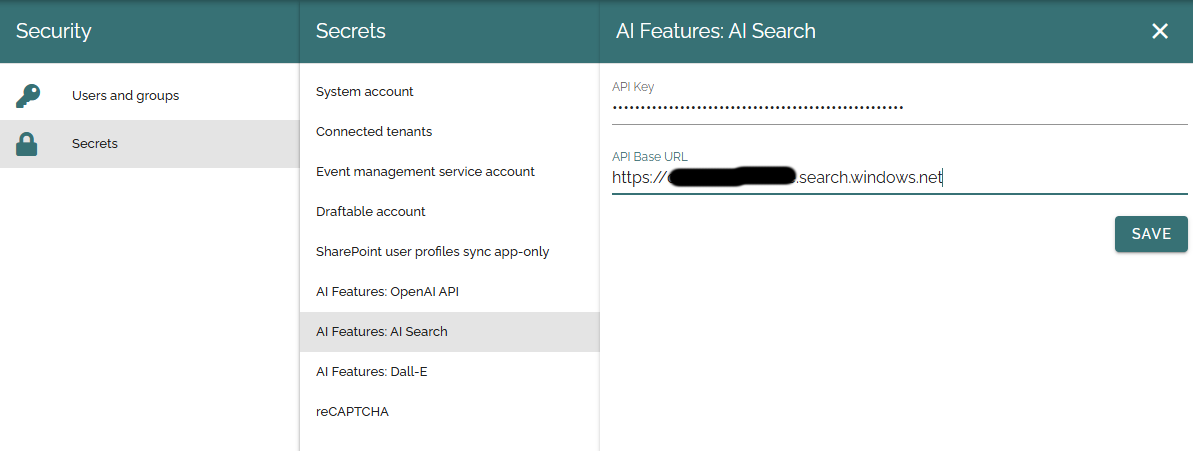
Step 8: Go to ‘Omnia Admin > Permissions > Secrets > AI features: AI Search’ and paste the key. Fill in the base url to your search service https://[service name].search.windows.net.
Text completion and content analysis
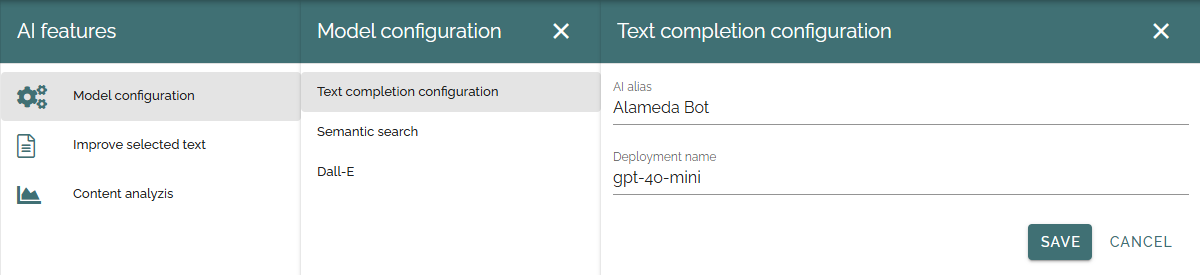
Step 1: Navigate to ‘Omnia Admin > Settings > AI features > Model configuration > Text completion configuration’. Add an alias for the AI bot and enter the model name from your previous OpenAI setup.
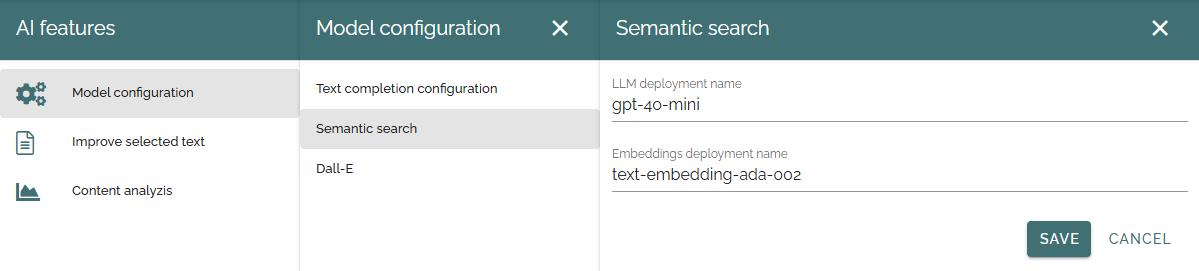
Semantic search
Step 1: Open the OpenAI service you created in the previous step and click ‘Go to Azure AI Foundry Portal’.
Step 2: Navigate to ‘Deployments’ and create a new deployment.
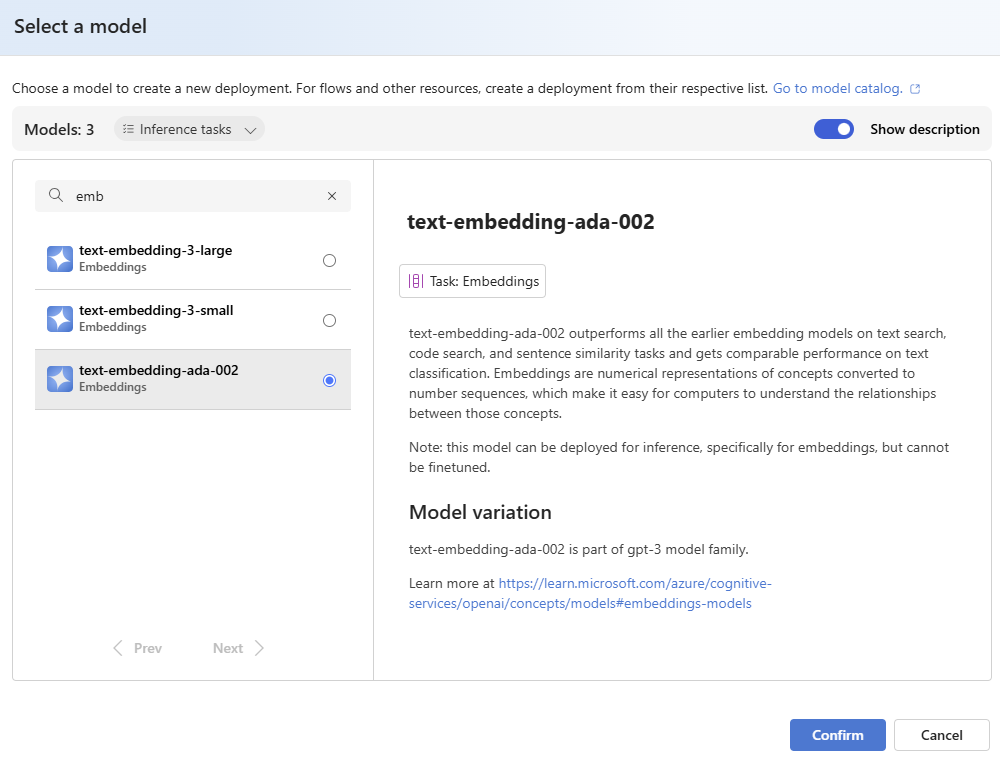
Step 3: Select an embeddings model for vectorization, for example text-embedding-ada-002. text-embedding-3-small is also supported.
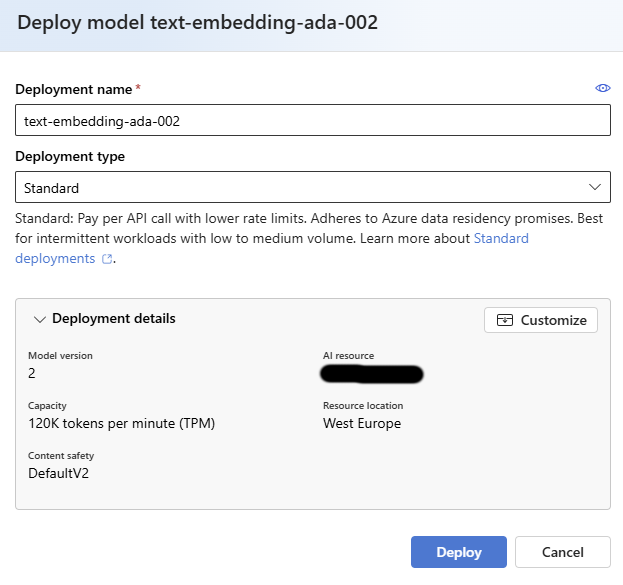
Step 4: Add a deployment name. We recommend using the model name for better identification. Keep all other settings as is, if you don’t have any specific requirements.
Step 5: Navigate to ‘Omnia Admin > Settings > AI features > Model configuration > Semantic search’. Enter the LLM deployment name from your OpenAI setup and the embeddings deployment name you just created.